
How to Make Mini Sticker Sheets in Silhouette Studio
Ever wanted to make mini sticker sheets so you could easily fit multiple on one page?
Making mini sticker sheets is great for kid’s party favors and being able fit multiple sticker sheets on one page saves you time and sticker paper.
Kiss cutting your stickers and then die cutting your sheets in one go is super easy in Silhouette Studio using the Cut By Layer feature. As an example, I will walk you through the process with my Valentine card mini sticker sheets.
I’ve made a video on YouTube that you can watch or read on to learn more!
Psst…
Totally new to sticker making?
Kiss Cut = cutting just the top layer of the sticker so that it can be peeled off the backing.
Die Cut = cutting all the way through the sticker and backing to make an individual sticker or sheet.
Step 1: File Setup
Import your design. Separate your kiss cut and die cut lines onto separate layers. Label the layers so we know which one is which later.
Tip: If you are using Silhouette Studio in Starter mode, you will need to click Show more at the bottom of the bar on the right side to see the Layers panel.
In Page Setup, choose your Machine, Cutting Mat, and Media Size.
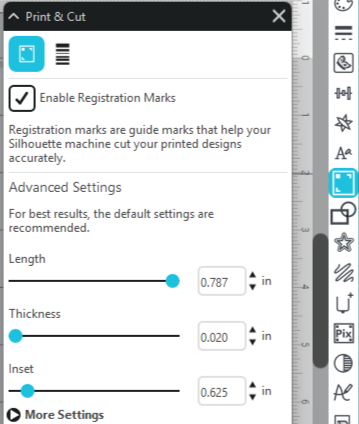
In the Print & Cut panel make sure the Enable Registration Marks box is checked.
Step 2: Print
Print your stickers.
You may need to adjust your printer settings to get accurate colors. This varies significantly by printer and the paper that you are using, however many printers can print a test sheet that shows a mini version of the image with different settings so that you can choose the best settings. See your printer’s manual for instructions.
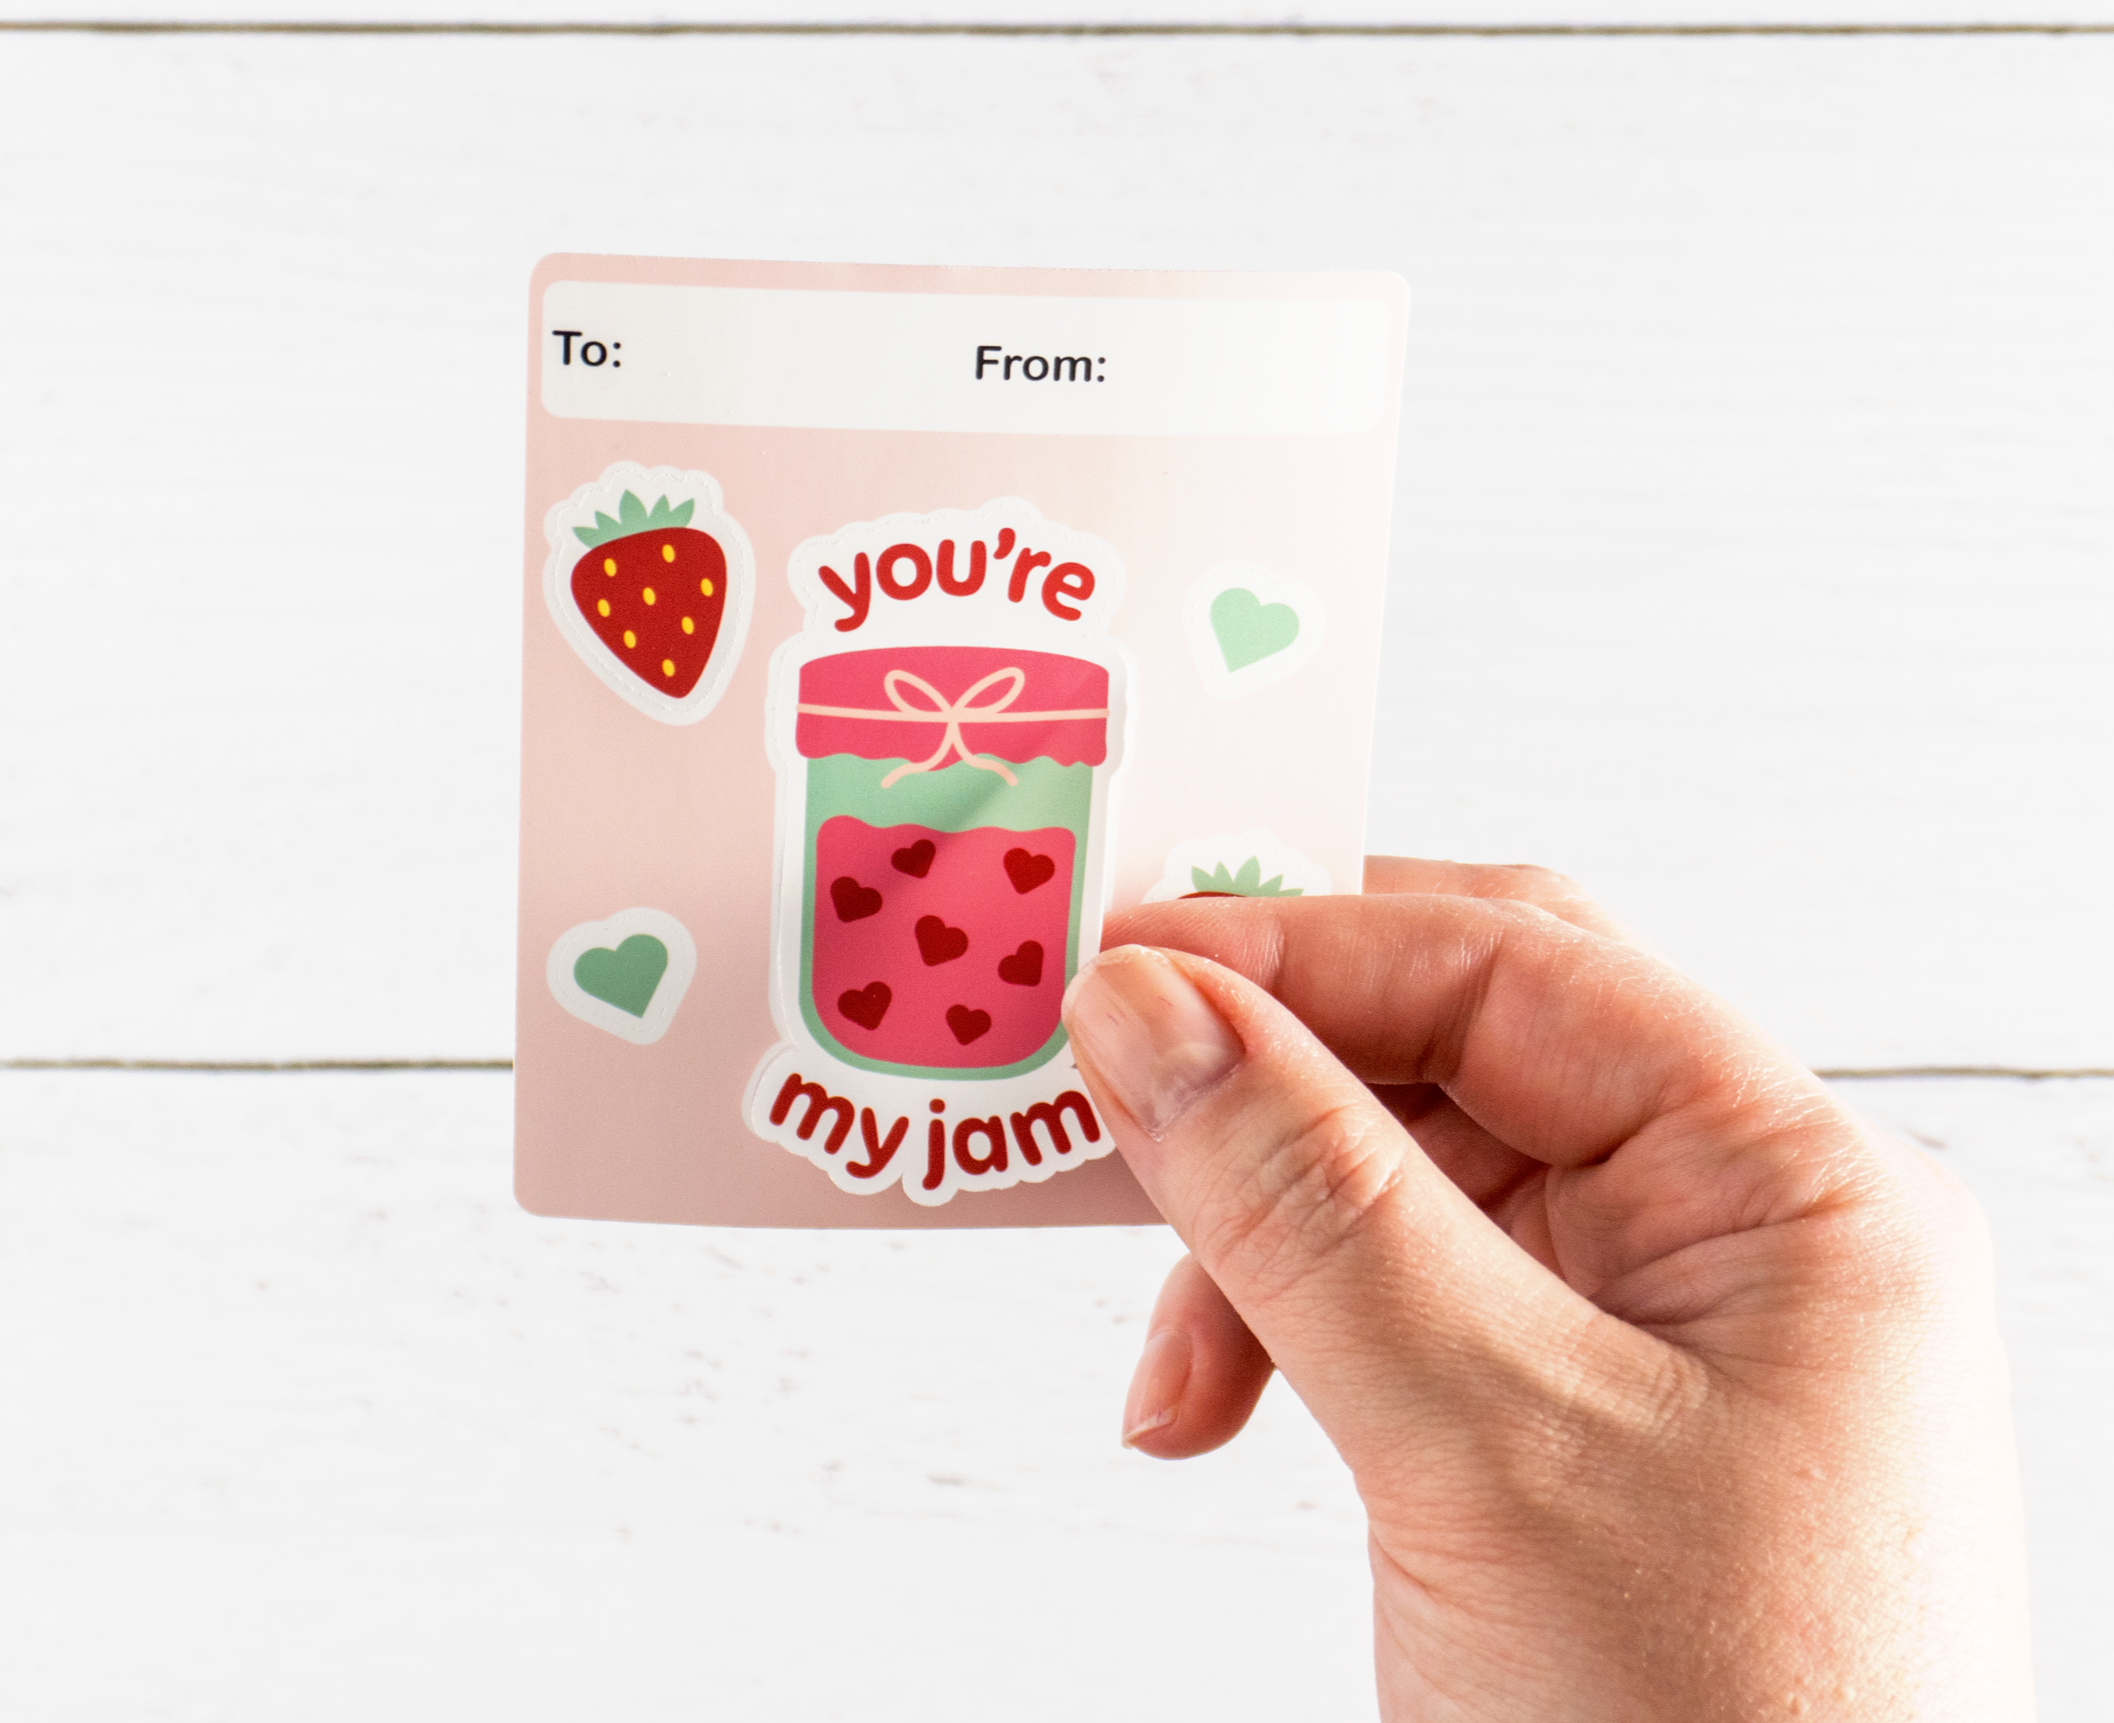
For these Valentine sticker sheets, I used Koala Printable Vinyl Matte White Sticker Paper. Vinyl sticker paper is more durable than standard sticker paper and the matte finish makes it easy to write who the Valentine card is to and from.
Step 3: Cut (aka Kiss and Die)
Put your printed sticker sheet on your cutting mat and load it into your Silhouette machine.
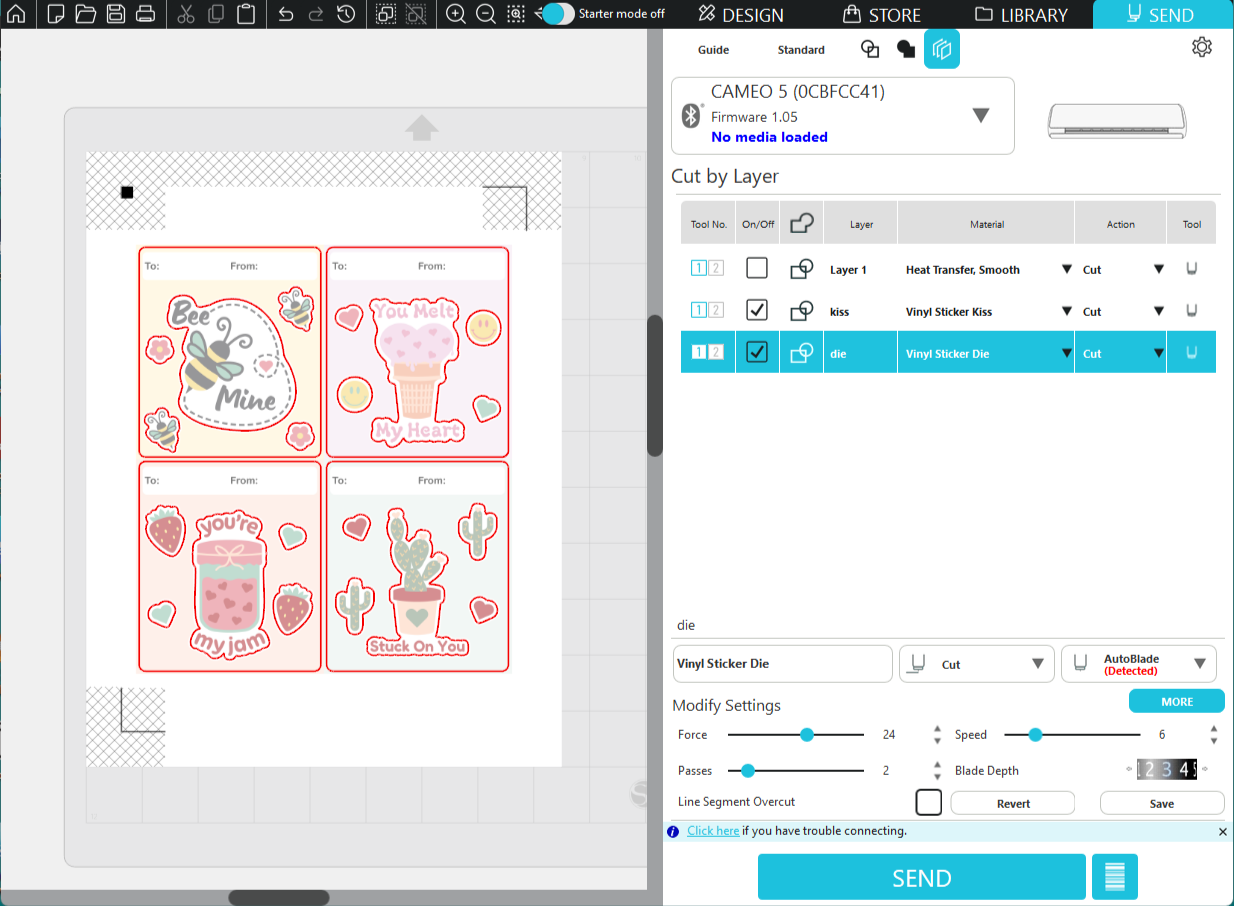
In Silhouette Studio, slick on Send in the upper right corner.
Choose the Cut by Layer icon at the top of the Send panel. It’s the last one on the right and looks like three squares in a row.
There is a row of settings for each layer in your project listed. Use the On/Off checkbox to uncheck the print layer. The checkbox for the kiss and die layers should be selected.
Tip: You can toggle the On/Off checkbox on your layers to see the cut line previews if you want to double check your layers.
Select the kiss layer and choose your Material. Adjust the settings as needed. I used the following cut settings with my Cameo 5 but remember that these will vary depending on your machine, blade sharpness, and brand of material.
Force: 12
Passes: 1
Speed: 5
Blade Depth: 3
Select your die layer and choose your Material. Adjust the settings as needed.
Force: 24
Passes: 2
Speed: 5
Blade Depth: 3
Click Send.
Once the machine is done cutting, unload your mat. The four individual sticker sheets should separate easily from the rest of the sticker material page. Check your stickers by lightly peeling up a corner.
That’s it! Using the Cut by Layer setting is easy and save time when making fun mini sticker sheets.
Some links in this post may be affiliate links. This means I may earn a small commission at no extra cost to you. I only share tools I genuinely use and love.