
Presents Shadowbox Card Assembly
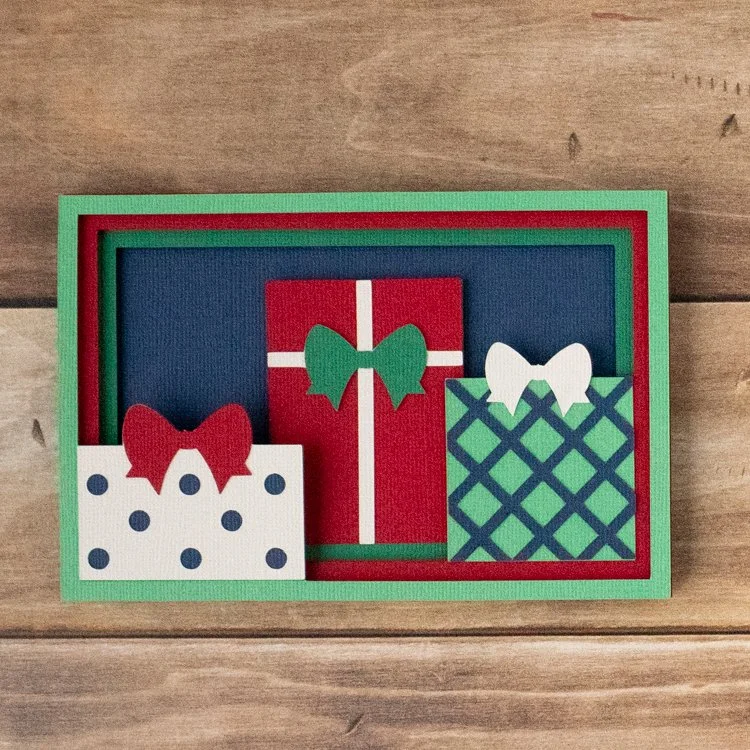
Supplies
Don’t have this design yet? Get it on Etsy or the Silhouette Design Store.
Cream cardstock
Navy blue cardstock
Red cardstock
Green cardstock
Minty green cardstock
Smooth white cardstock (for the inside, if you are using textured cardstock)
Glue
Double-sided foam tape (narrow)
I used Encore textured cardstock from 12×12 Cardstock Shop for this card in the following colors:
Blue Jeans
Green Green
All American Red
Shamrock
Touch of Peach
Assembly Steps
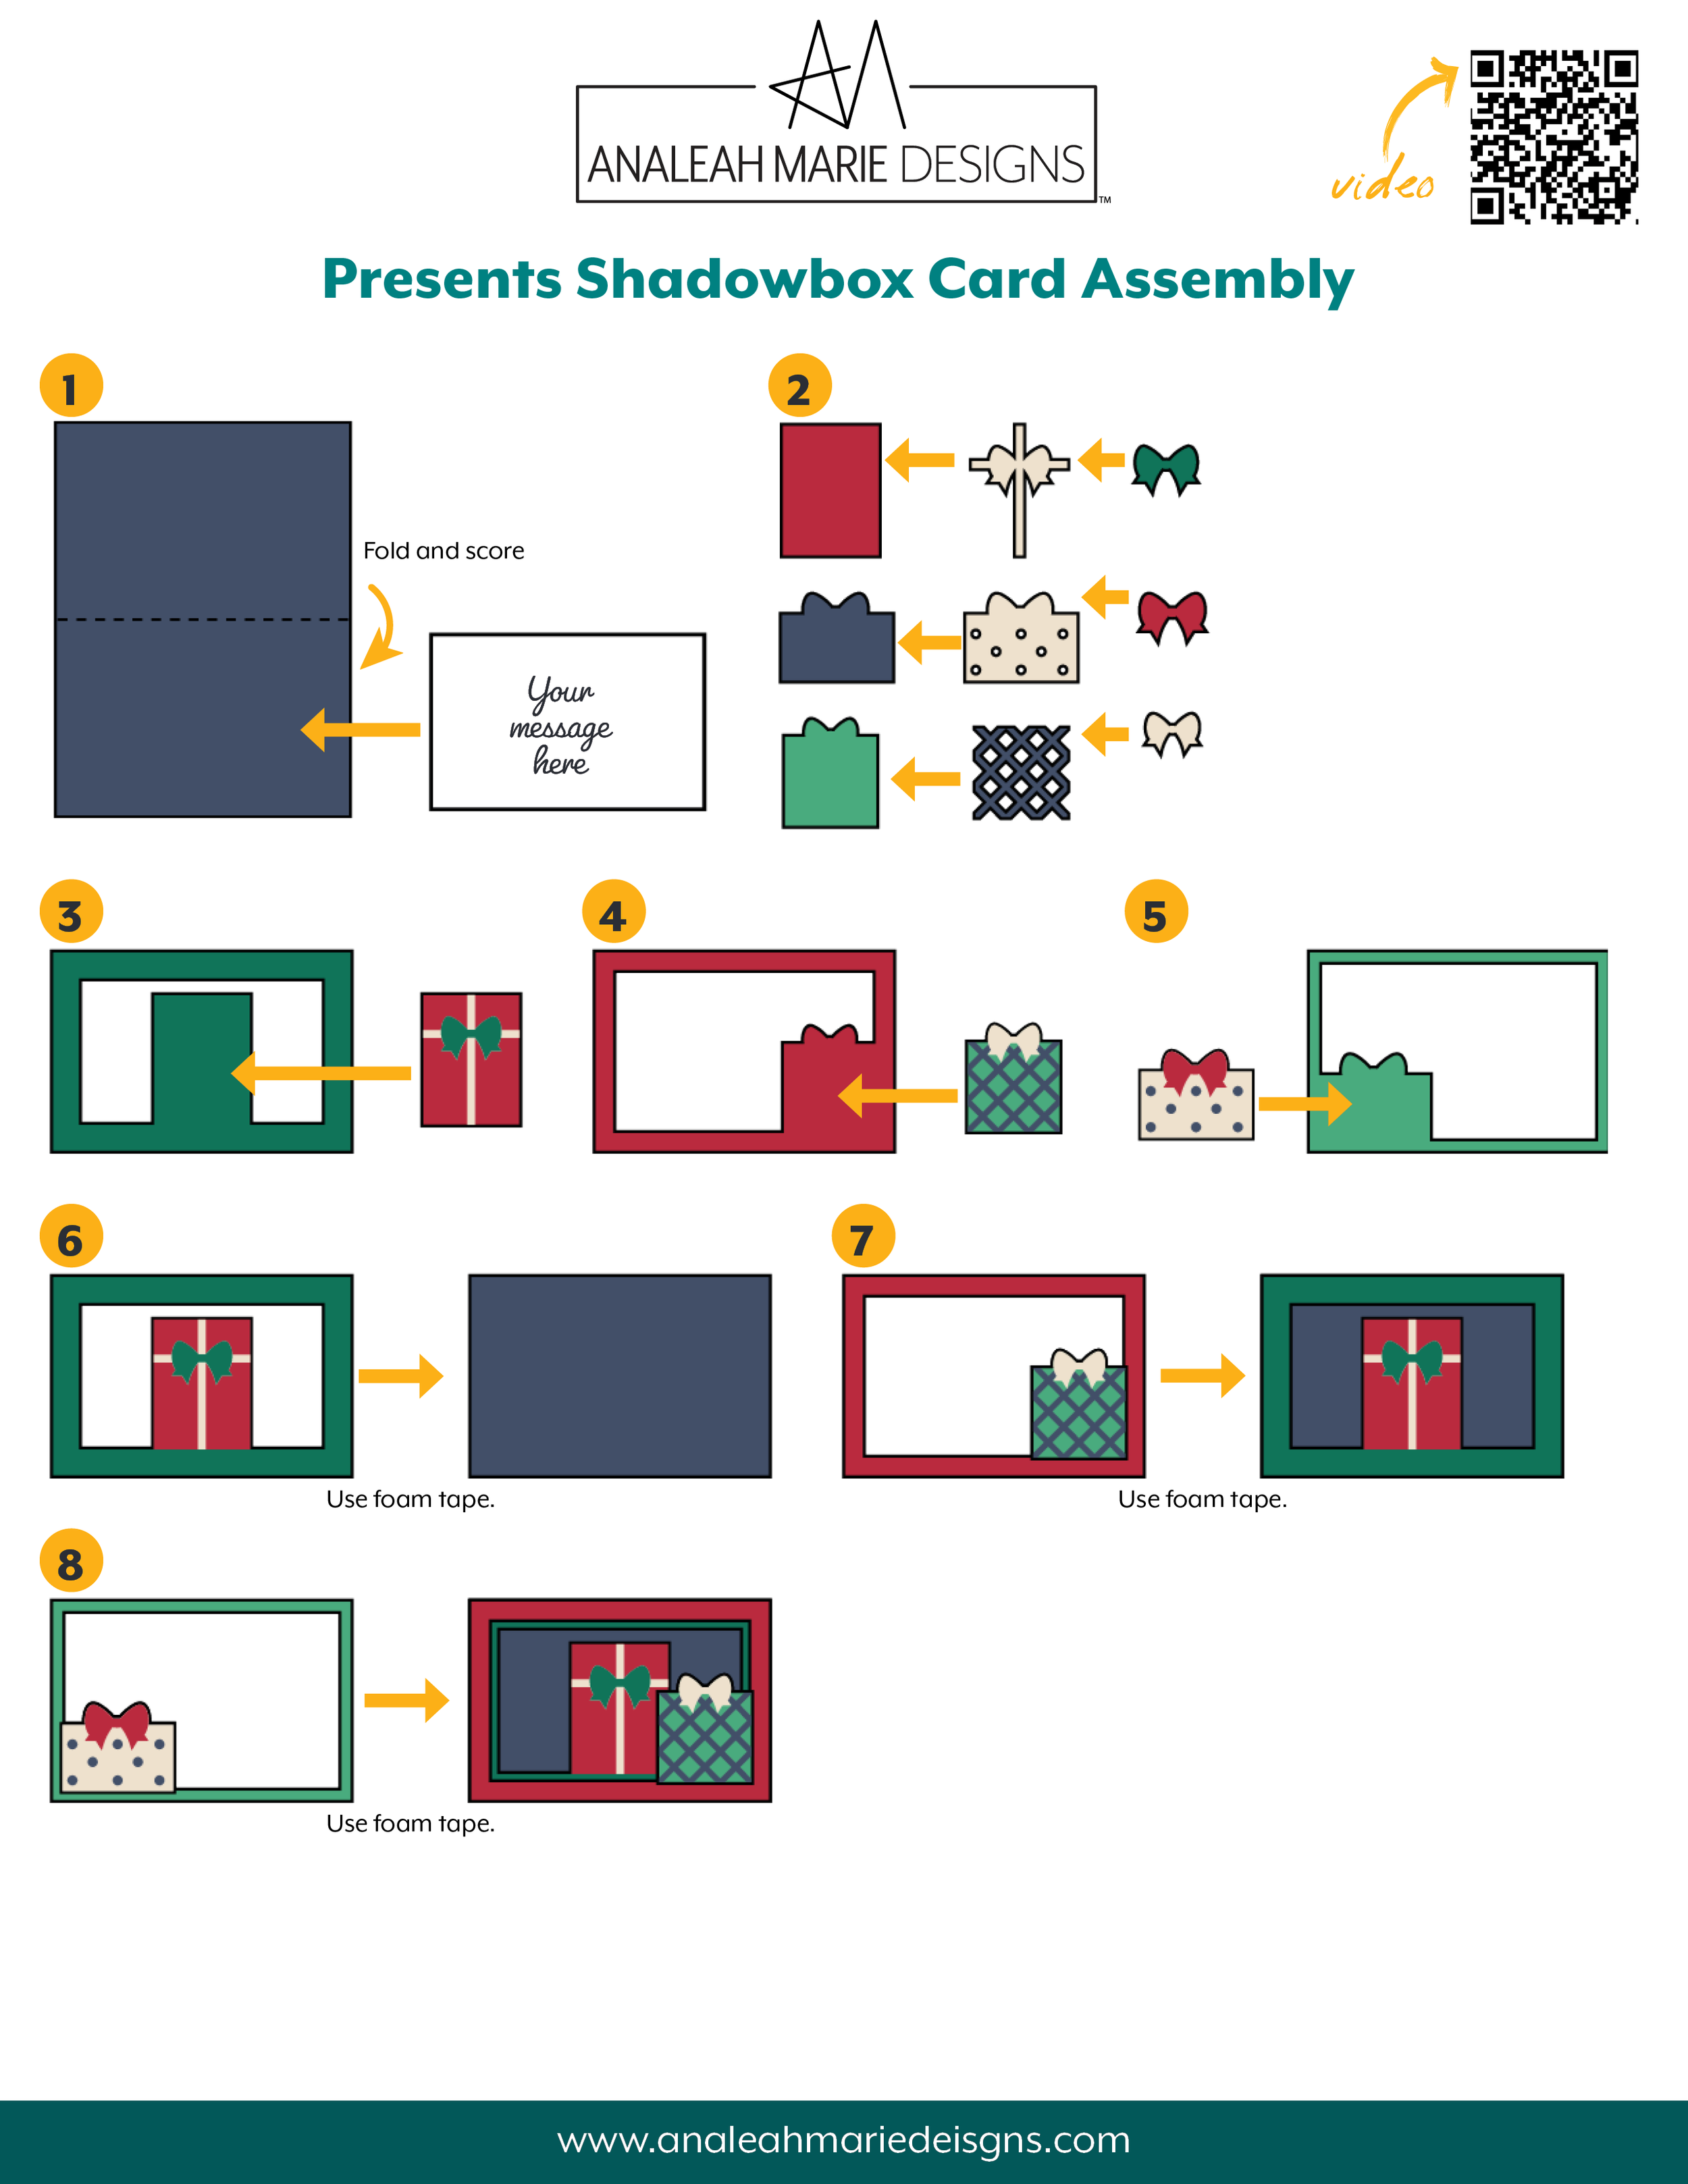
Tip: To help support the presents on the second and third layers, stack foam tape underneath them.
Fold and score the card base. Glue the smooth white insert inside the card.
Glue the decorative pieces to each present.
Glue the tall red present on the first frame layer (widest border).
Glue the square present on the second frame layer.
Glue the short present on the top frame layer.
Using foam tape, attach the first frame layer to the front of the card.
Using foam tape, attach the second frame layer on top of the first frame.
Using foam tape attach the third frame layer on top of the second frame.
This card fits in my 4×6 box envelope. You can purchase the envelop cut file on Etsy or the Silhouette Design Store.
If you like this card, check out the full shadowbox card collection!