
Happy Easter Egg Card Assembly
Supplies
Teal/green cardstock
Purple cardstock
Yellow cardstock
Smooth white cardstock (inside of card)
Glue or double-sided tape
Foam tape (optional if you want to add some dimension)
Adhesive vinyl (optional for lettering)
I used paper from the AC Cardstock Pastel collection (https://amzn.to/40qNkqI). This paper works well for layering, though it is lighter weight than papers like 12×12 Cardstock Shop Encore or Bazzill textured cardstock, so the finished card can feel a little flimsier. That being said, I like the AC Cardstock packs because they are coordinating color palettes, which make it easy to quickly pick colors that work well together for layered cards and you can get these packs in most local craft stores. AC Cardstock is also a great option if you are making a lot of cards and are sticking to a budget.
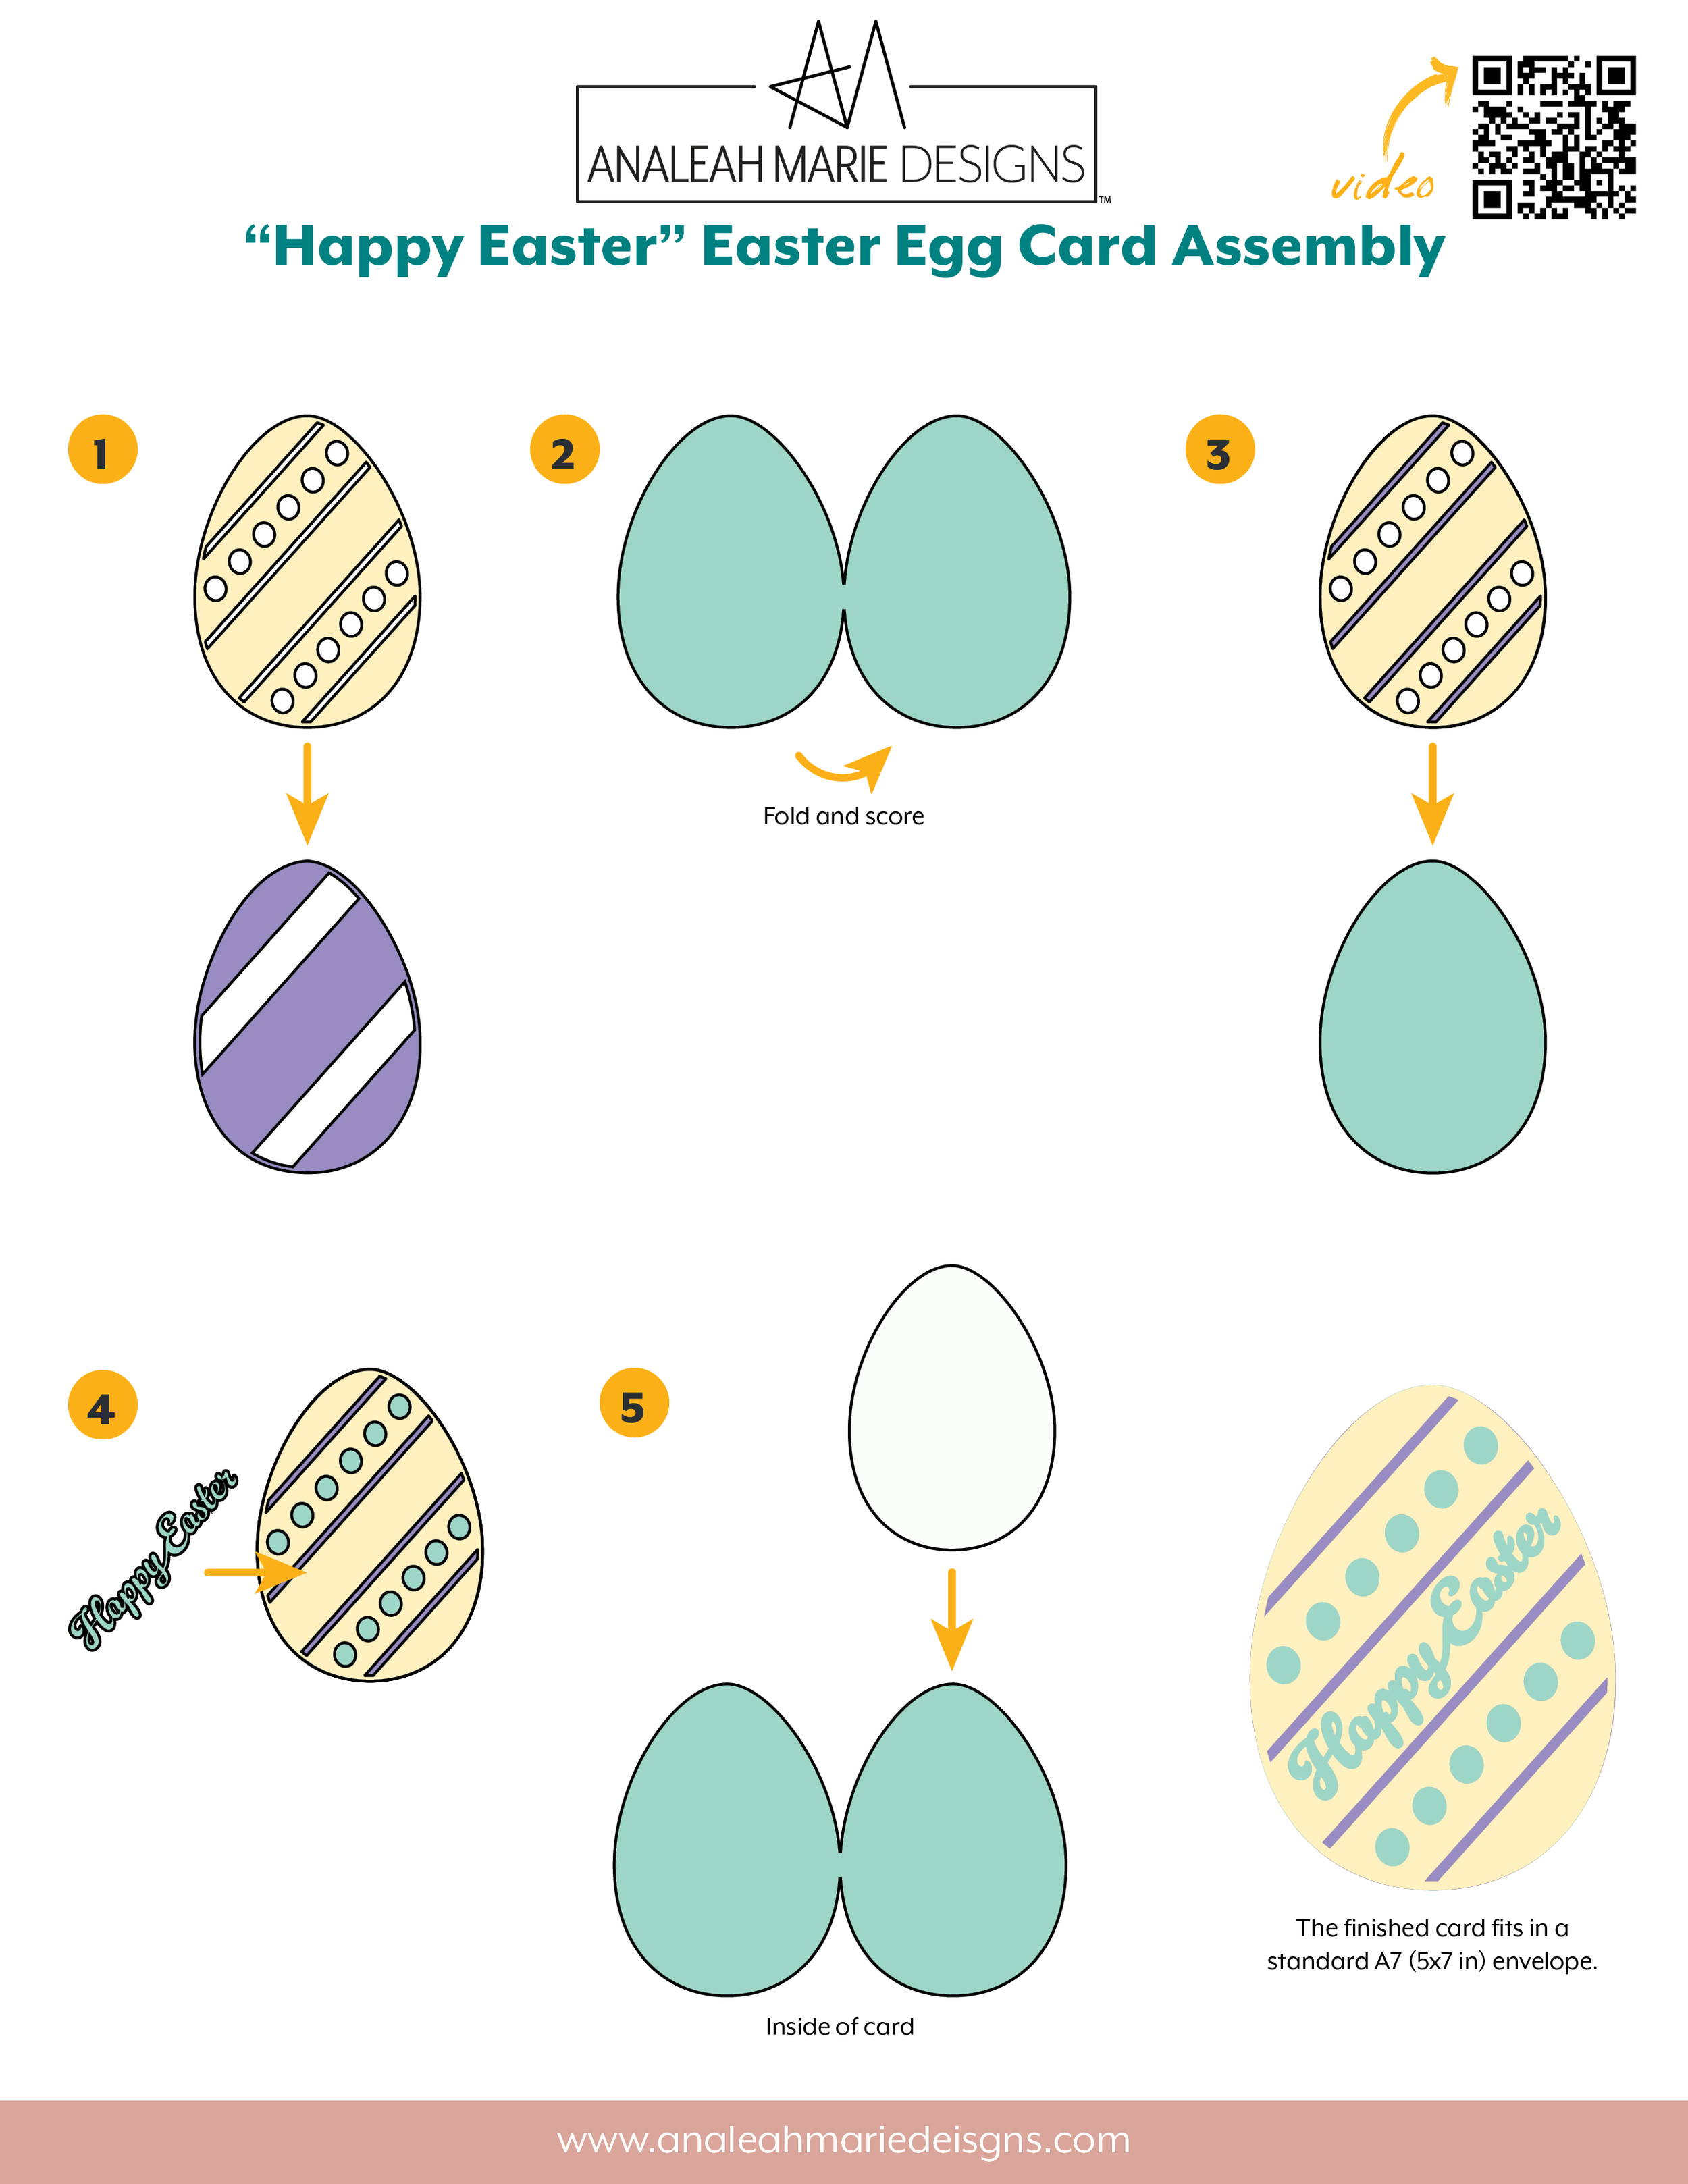
Assembly
Glue the yellow egg piece on top of the purple egg piece.
Fold and score the card base. Note that there is not score line on the card base because the attachment area is small. Just line up the sides of the egg.
Glue the combined yellow and purple egg piece on to the front of the card.
Attach the lettering to the front of the card.
Glue the white smooth cardstock insert inside the card.
That’s it! Easy-peasy.
Some links in this post may be affiliate links. This means I may earn a small commission at no extra cost to you. I only share tools I genuinely use and love.