Witch Hat Garland Assembly
Supplies
Black cardstock
Purple cardstock
Green cardstock
Yellow cardstock
Orange cardstock
Blue cardstock
White cardstock
Glue, double-sided tape
Hot glue
String or yarn
Disposable straws (optional)
Assembly Steps
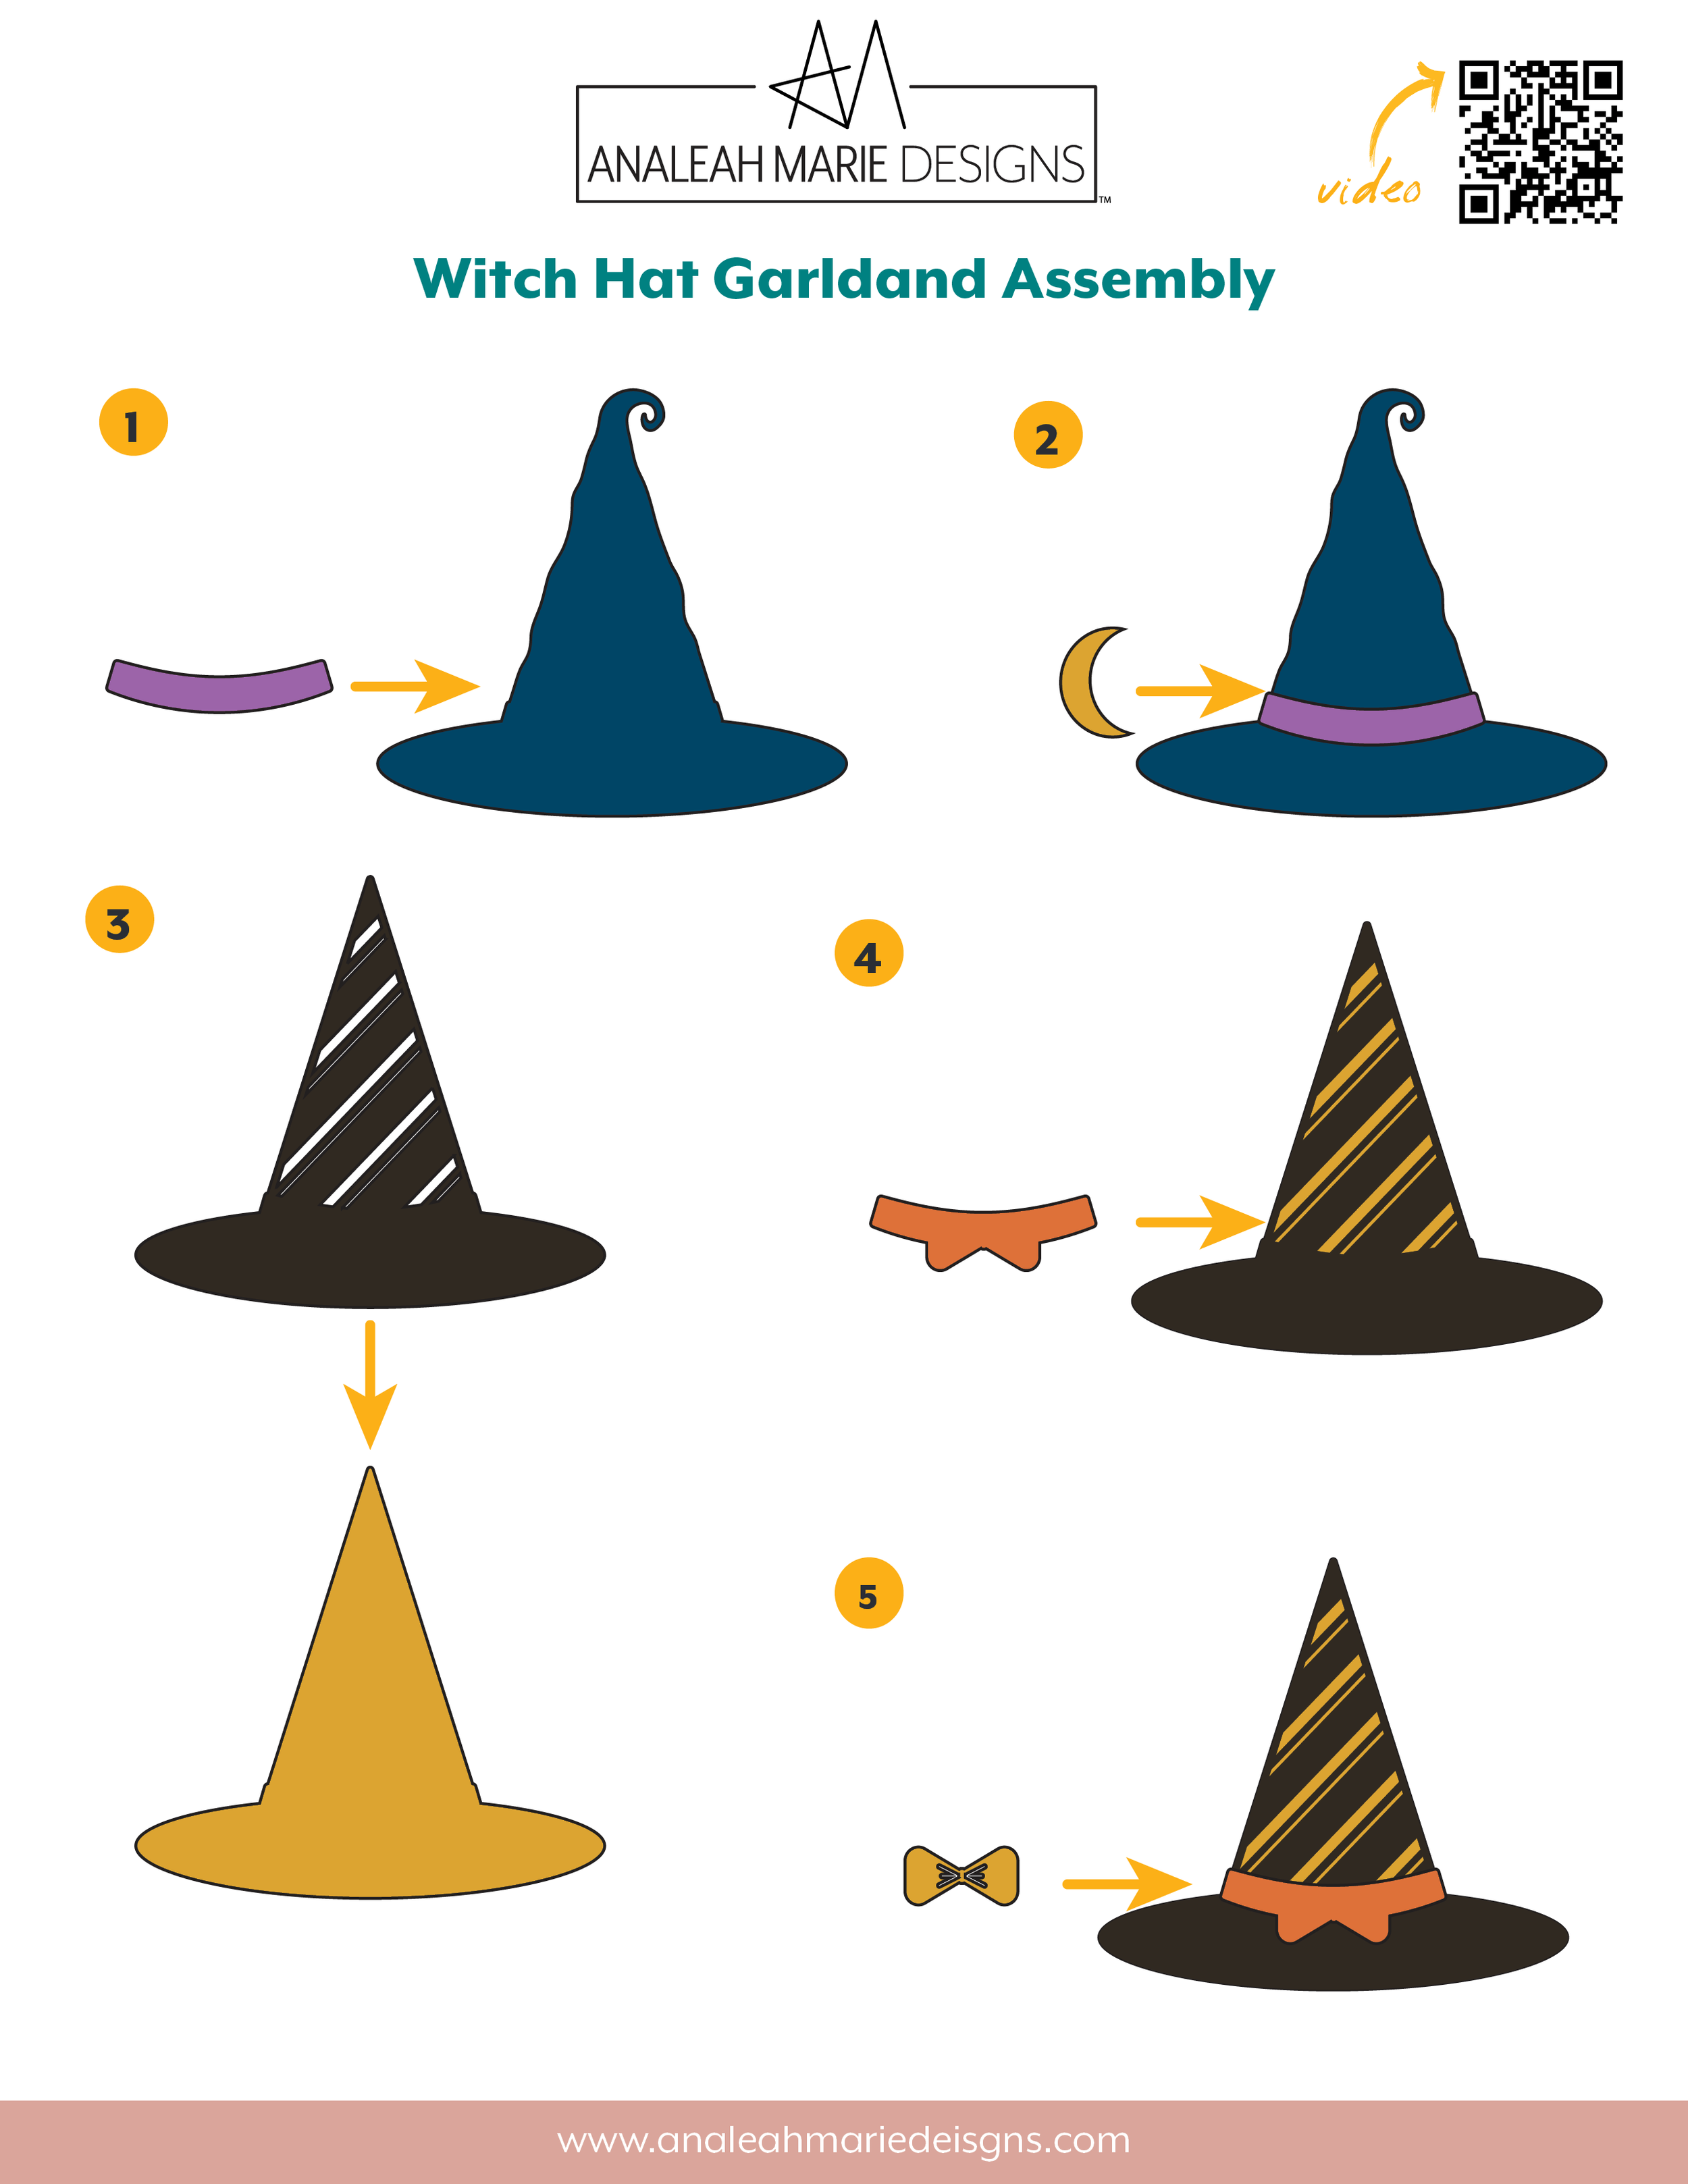
Moon Witch Hat
Attach the purple band to the front of blue witch hat base that has a curl on top.
Tip: Each hat base bumps out a little on the sides where the band goes for easy alignment.
Attach the yellow moon to the center of the purple band.
Stripped Witch Hat
Attach the black stripped piece to the yellow witch hat base.
Attach the orange band piece to the front of the black stripped hat.
Attach the yellow bow to the front of the orange band on the stripped hat. Line up the bottom of the bow with the corresponding shape on the orange band.
Bat Witch Hat
Attach the green band with bat wings to the purple hat base.
Attache the bat to the green band, lining up the wings and ears.
Spider Witch Hat
Attach the green band to the blue witch hat that curves at the top.
Attach the white spiderweb piece to the brim of the hat. Make sure that the ends of the spiderweb are pointing towards the center of the hat.
Attach the yellow buckle to the center of the band.
Attach the web string end of the spider to the tip of the hat. The web can be attached on either the front or the back.
Bubble Witch Hat
Attach the black bubble piece to the front of the green witch hat base.
Attach the purple band to the hat.
Attach the yellow buckle to the center of the band.
Banner Assembly
Cut a piece of yarn or string to the length you want your banner to be. I measured 72 inches. This gives me 12 inches between the center of each hat, and about 6 inches on each end. Adjust the length based on how much space you want between your hats and how much space you need on the ends to attach where you are going to display your banner.
Arrange the hats in your preferred order. Measure up about 4 inches from the brim of each hat and mark the center on the back with a pencil.
Space the hats along the yarn. Again, I spaced mine about 12 inches apart from middle to middle. Use the hot glue to attach each hat to the yarn.
If you want your hats to be able to be moved freely on the yarn, use pieces of a drinking straw to create a tube on the back. Cut 5 pieces of straw about 1.5 inches long and glue them to the back of each hat. Then thread the yarn through the tubes to string your banner.