Snowflake Coffee Cup Gift Card Holder Assembly
Supplies
Blue cardstock
Light blue cardstock or patterned paper
Craft paper cardstock
Light grey cardstock
White cardstock
Glue (tape dots or tape runner are not recommended)
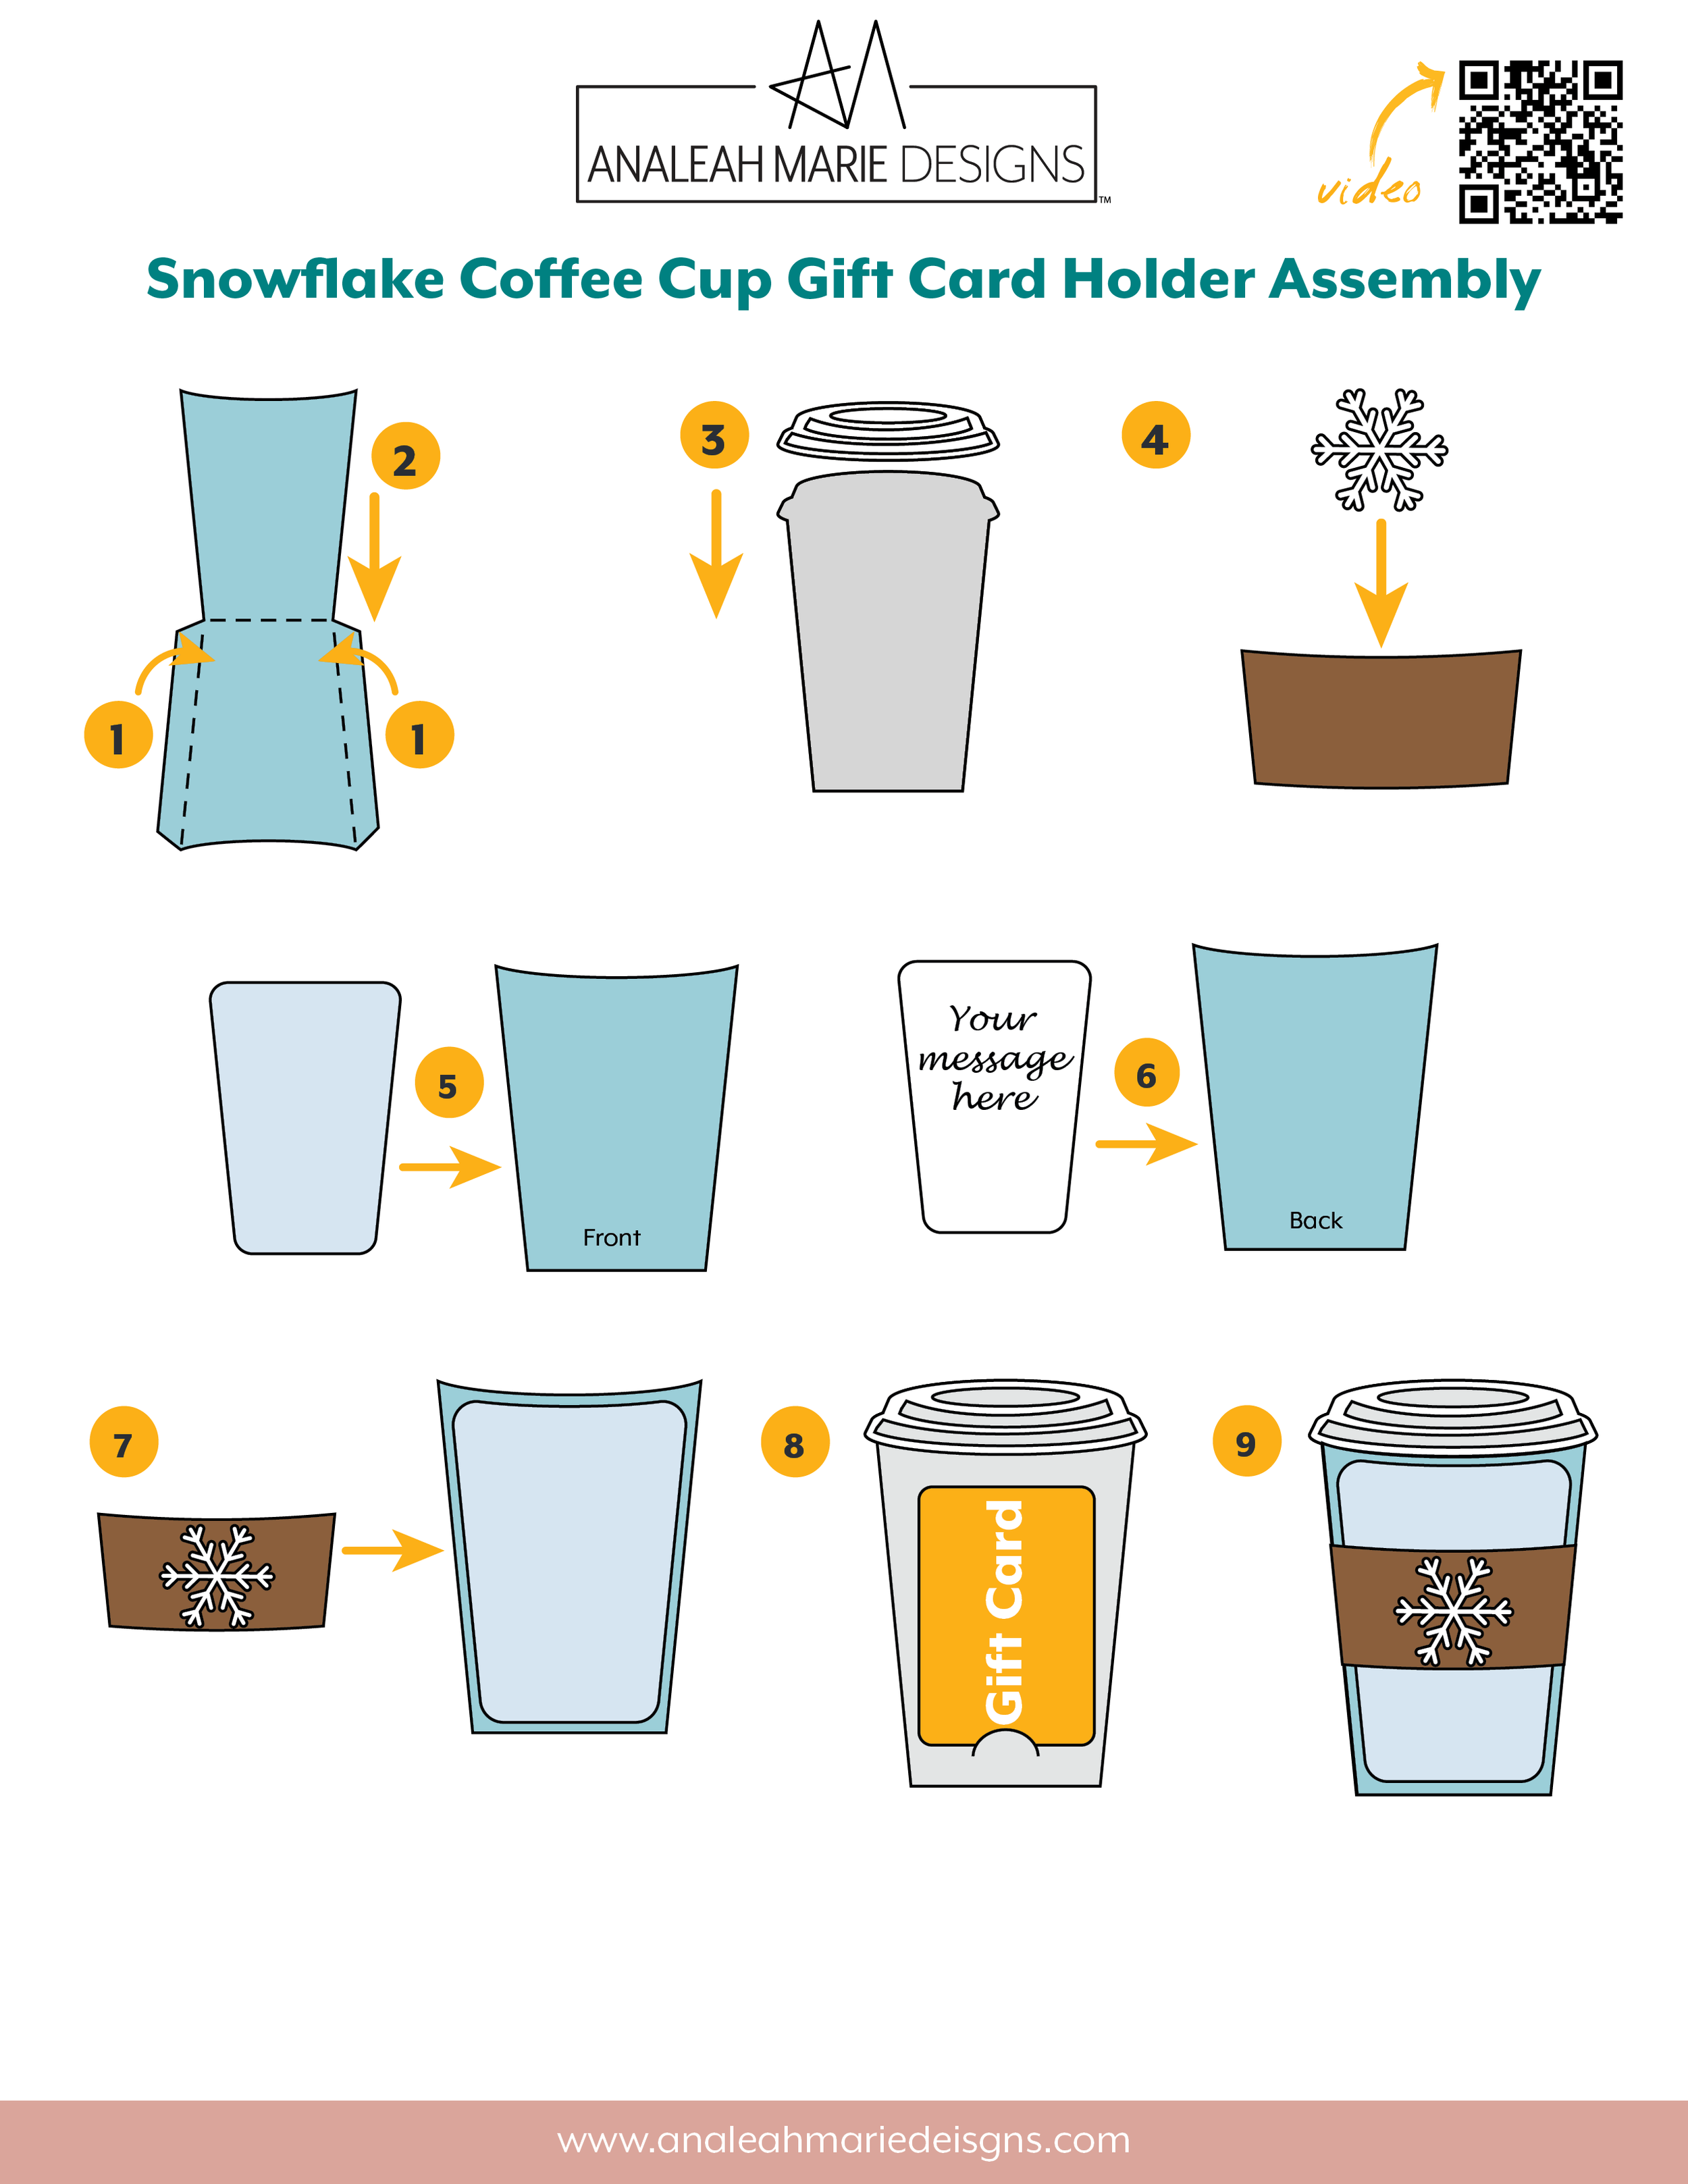
Assembly Steps
Fold and crease the flaps on the cup base.
Fold and crease the front of the cup base down over the flaps. Add glue to the cup base flaps then glue the front of the cup base down to the flaps, making a pocket.
Glue the white cup lid to the light gray cup insert.
Glue the snowflake onto the cup sleeve.
Glue the light blue cardstock or patterned paper front piece to the front of the cup base pocket.
Write you message on the white card and then glue it onto the back of the cup base. It is highly recommended writing your message before glueing, as it will be hard to write on it once the gift card holder if fully assembled.
Glue the sleeve to the coffee cup base, lining up the edges of the sleeve to the sides of the cup.
Tuck your gift card into the flap at the bottom of the cup insert.
Slide the insert with the gift card into the pocket in the cup base.