Present Gift Card Holder Assembly
Supplies
Pink cardstock
Purple cardstock
Glue (tape runner or tape dots are not recommended)
This design is super customizable. You can completely change the look by using different colored cardstock, patterned paper, glitter cardstock, etc. Get creative!
Assembly Steps
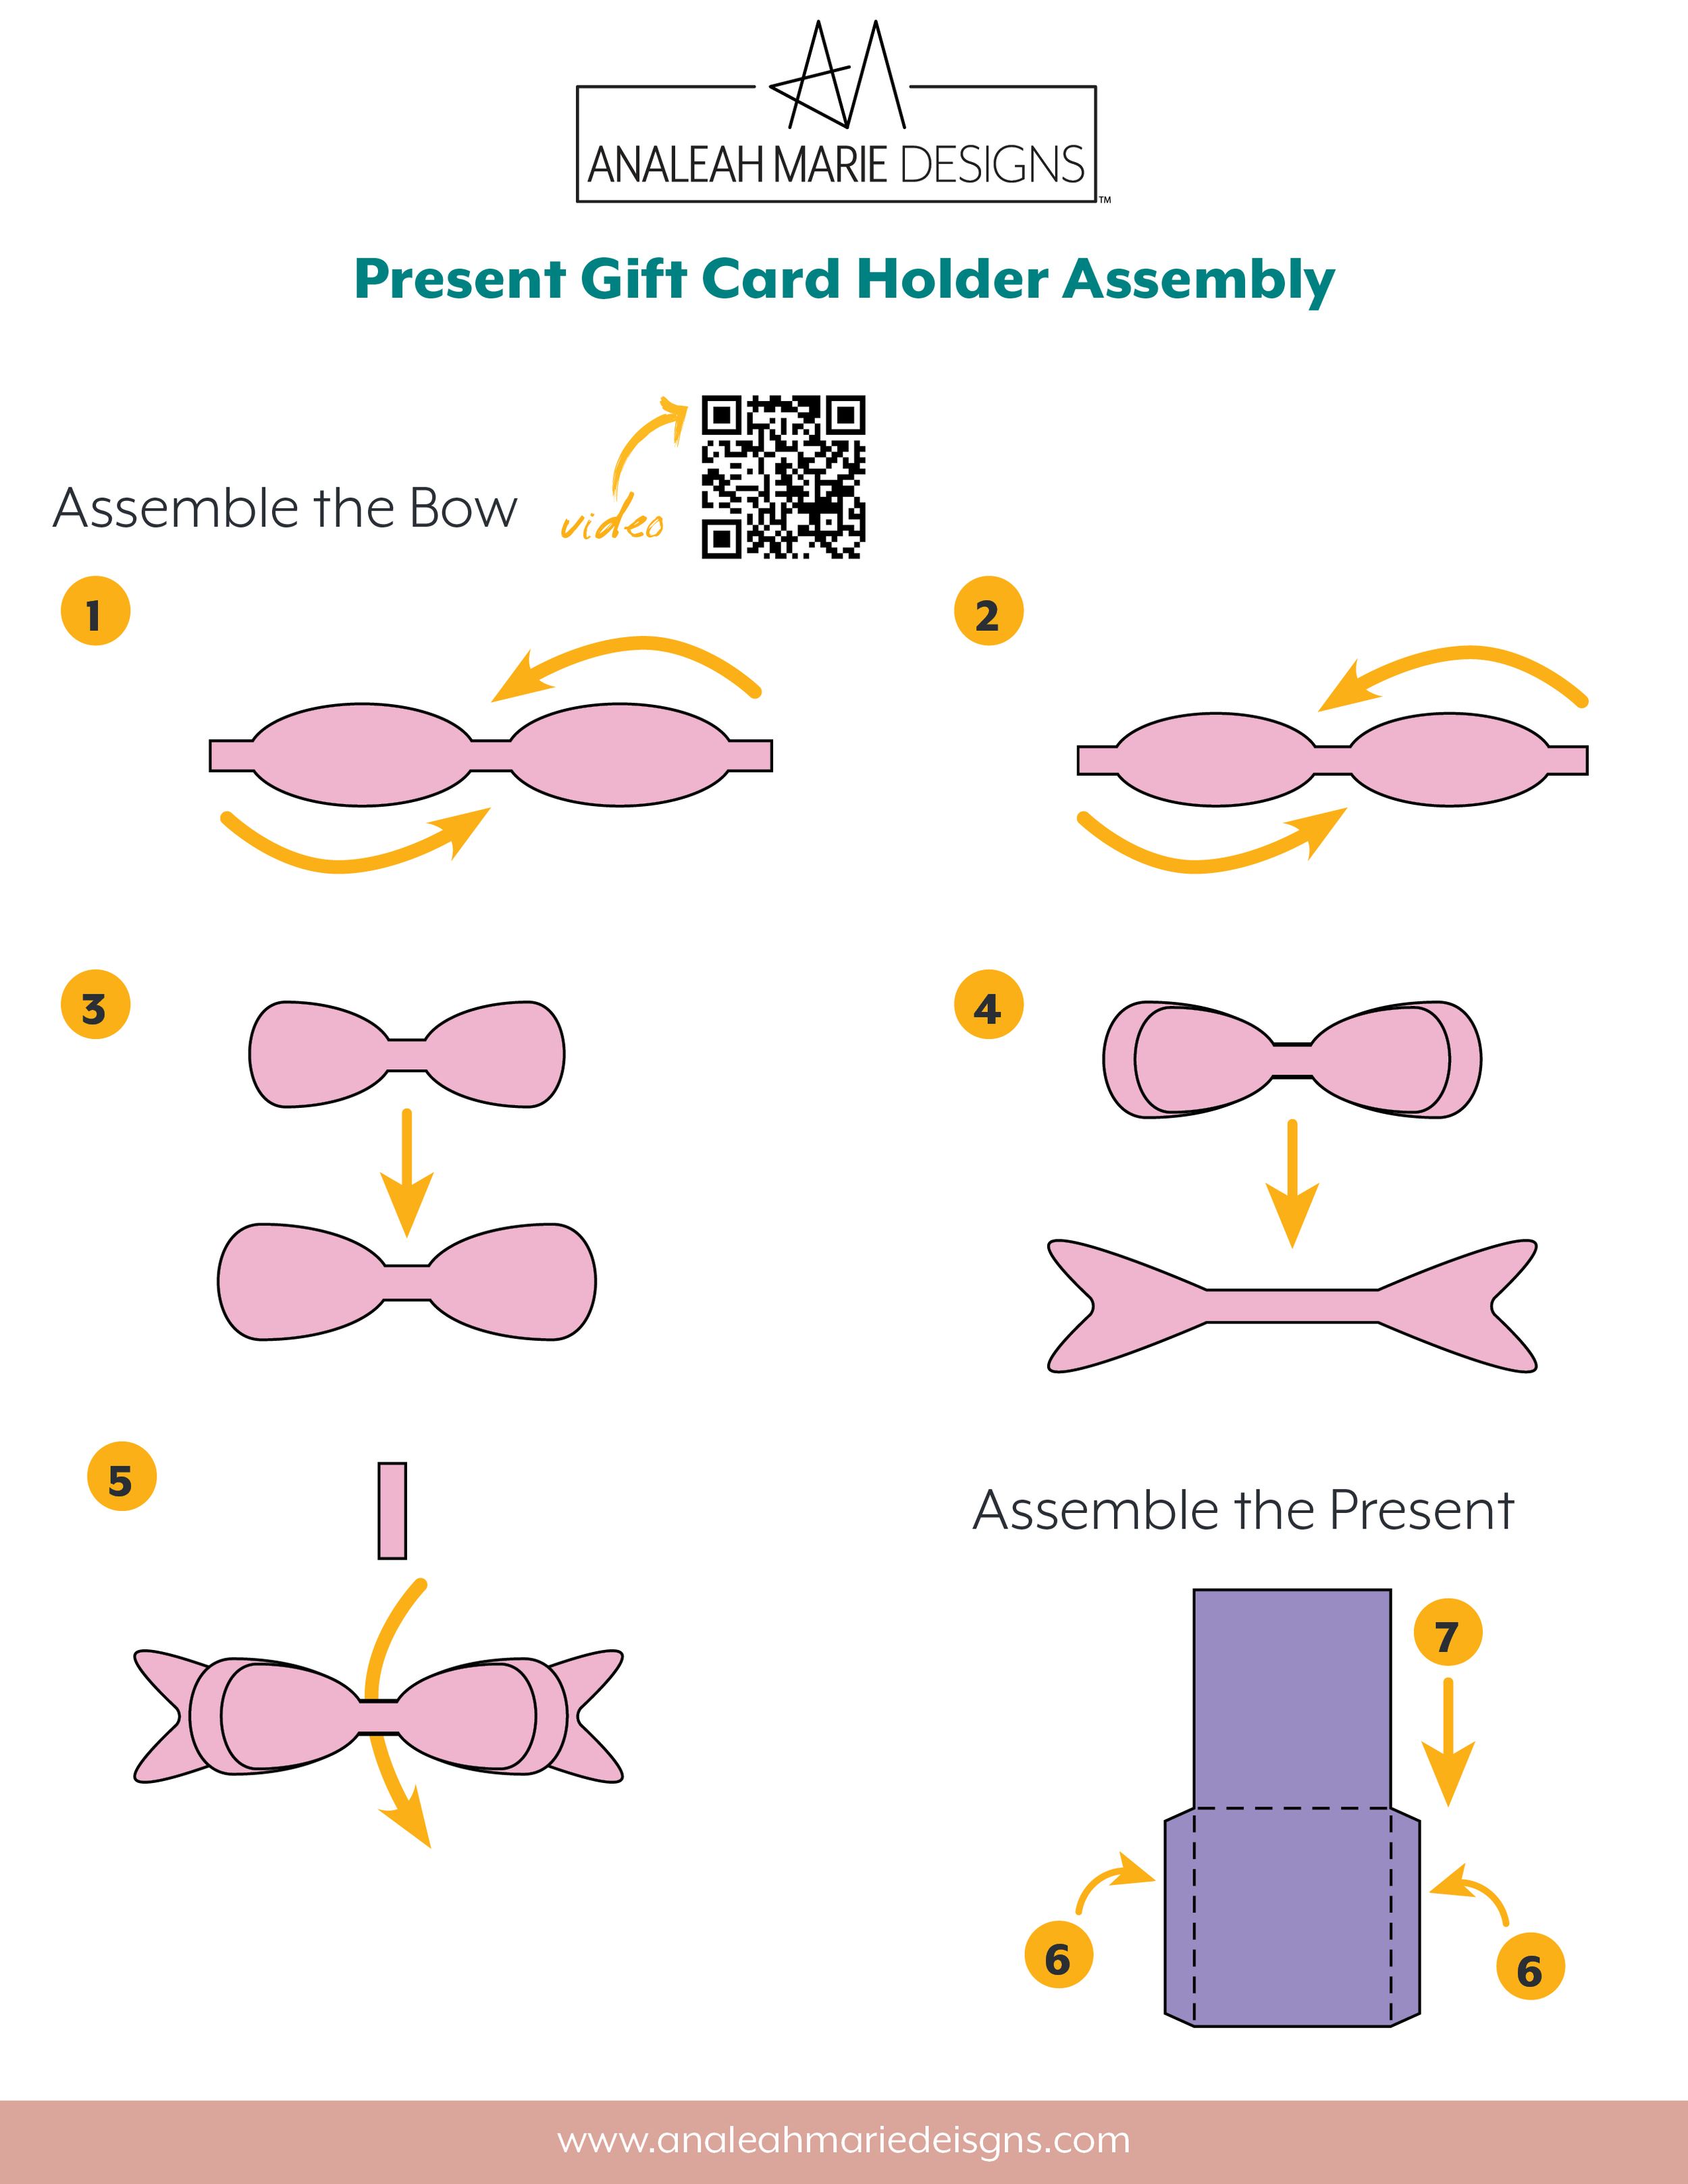
Assemble the Bow
Take the larger piece of the blow (looks a bit like a bow tie), and glue the tabs on each end to the area in the center. Don’t crease the loops created on the sides of the bow.
Hold this piece for a few seconds to let the glue dry.
Repeat step 1 for the smaller piece of the bow.
Glue the smaller bow on top of the larger bow and hold in place for a few seconds to the let the glue dry.
Glue the stacked bows on top of the long piece with a V-shape on the ends. This makes the ends of ribbon on the bow. Hold these pieces together for a few seconds to allow the glue to dry.
Wrap the small rectangle around the center of the bow. Glue one end the back of the bow and then wrap the piece over the font and then glue the other end. Pinch the whole bow together in the center for a few seconds to allow the glue to dry. Then set the bow aside.
Assemble the Present
Fold and crease the side flaps on the present base.
Fold and crease the front of the present base down over the flaps. Add glue to the base flaps then glue the front of the present base down to the flaps, making a pocket.
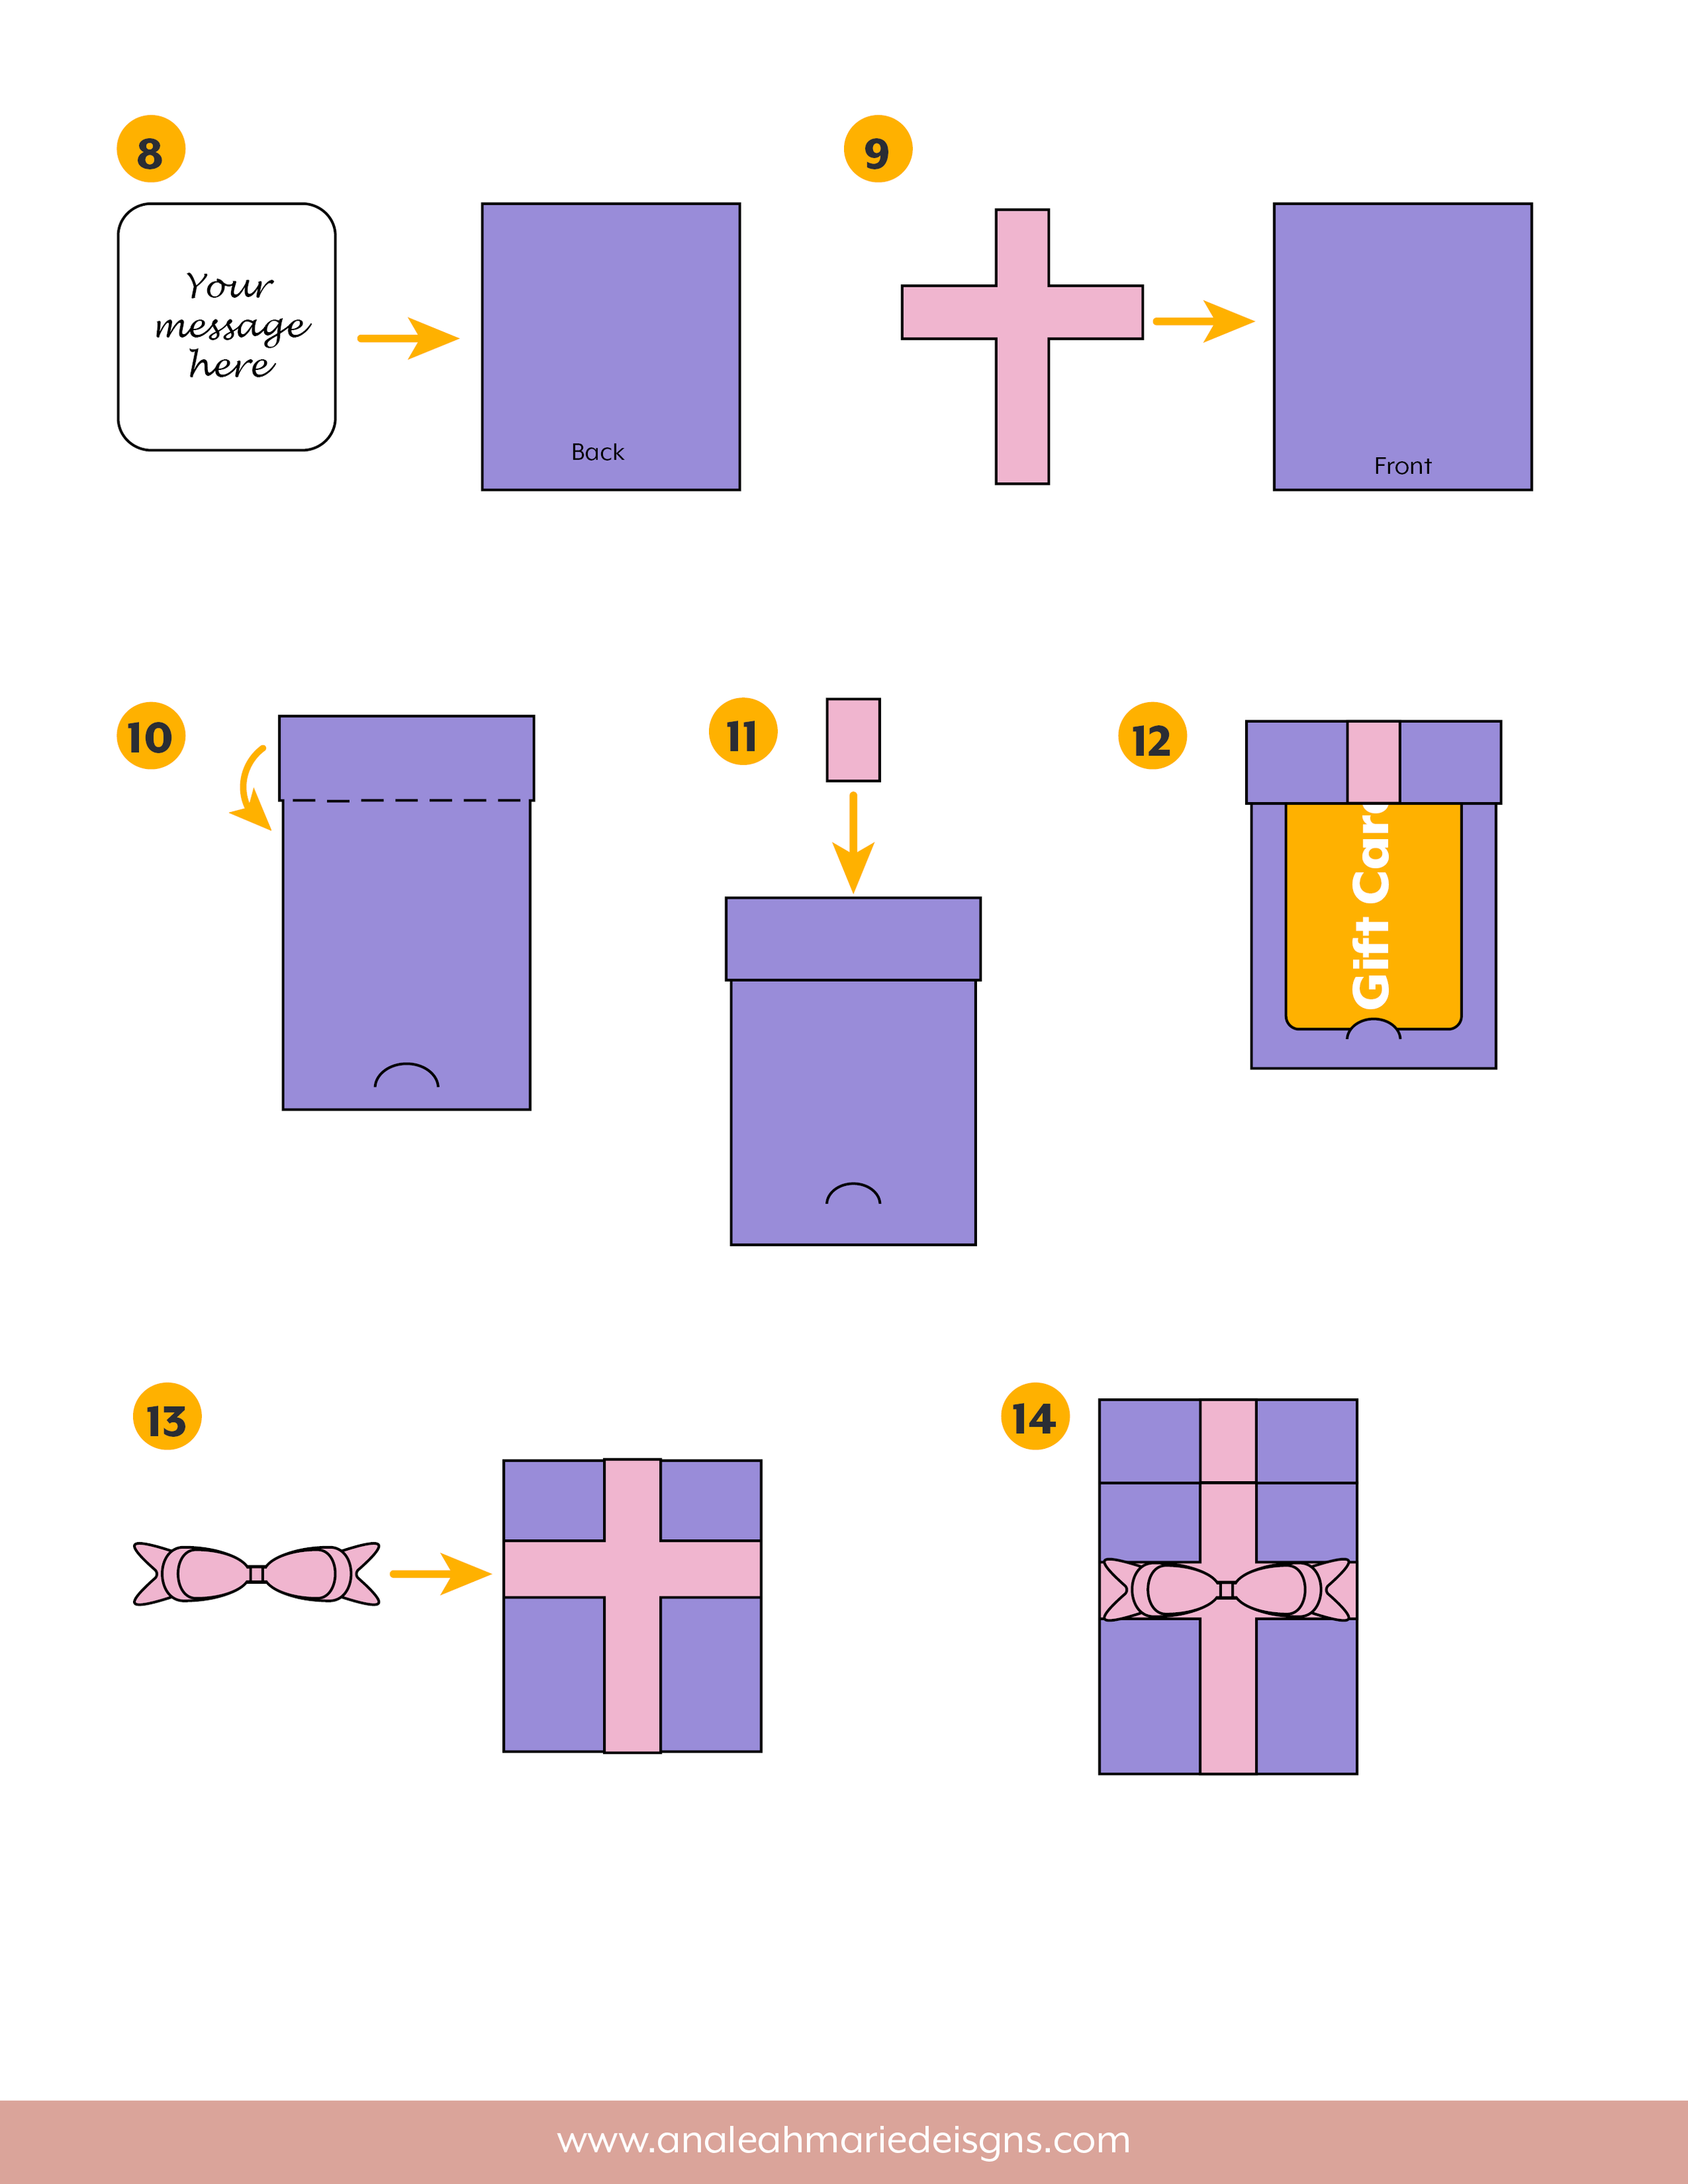
Write you message on the white card and then glue it onto the back of the present base. I highly recommended writing your message before glueing, as it will be hard to write on it once the gift card holder if fully assembled.
Glue the large cross-shaped ribbon piece onto the front of the present base.
Fold and crease the top flap of the present insert. Glue the flap down on just the edges so that it creates a pocket in the middle of the flap.
Note that the flap is slightly larger than lower part of the insert, this is so that the insert fits neatly into the pocket in the present base and the top of the inset aligns with the edges of the base.
Glue the little ribbon piece to the center of the front of the pocket on the top of the insert.
Tuck your gift card into the pocket in the top of the insert and the tab at the bottom of the insert.
Glue the bow to the front of the present base.
Slide the insert into the pocket in the present base.