
Pencil Coffee Cup Gift Card Holder Assembly
Supplies
Mint green cardstock
Yellow cardstock
Tan cardstock
Pink cardstock
Matte silver metallic cardstock
Grey cardstock
White cardstock*
Glue (tape dots or tape runner are not recommended)
Foam dots (optional)
*If using textured cardstock for the card, I recommend using white textured cardstock for the lid and white smooth cardstock for the panel on the back for your message. If you don’t have smooth white cardstock on hand, you can flip the textured cardstock around and use the back side, which is usually smoother.
For this card I used colors from the AC Cardstock Pastel collection (Buy on Amazon) and AC Cardstock Neutral collection (Buy on Amazon):
Robin’s Egg (pastel collection)
Flamingo (pastel collection)
Banana (pastel collection)
White (pastel and neutral collection)
Stone (pastel and neutral collection)
Charcoal (neutral collection)
I also used matte silver cardstock from 12×12 Cardstock Shop for the ferrule and kraft cardstock from my local craft store for the sleeve.
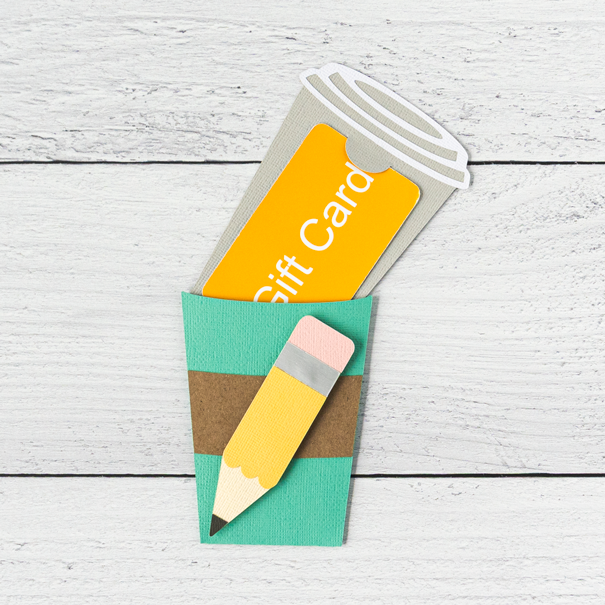
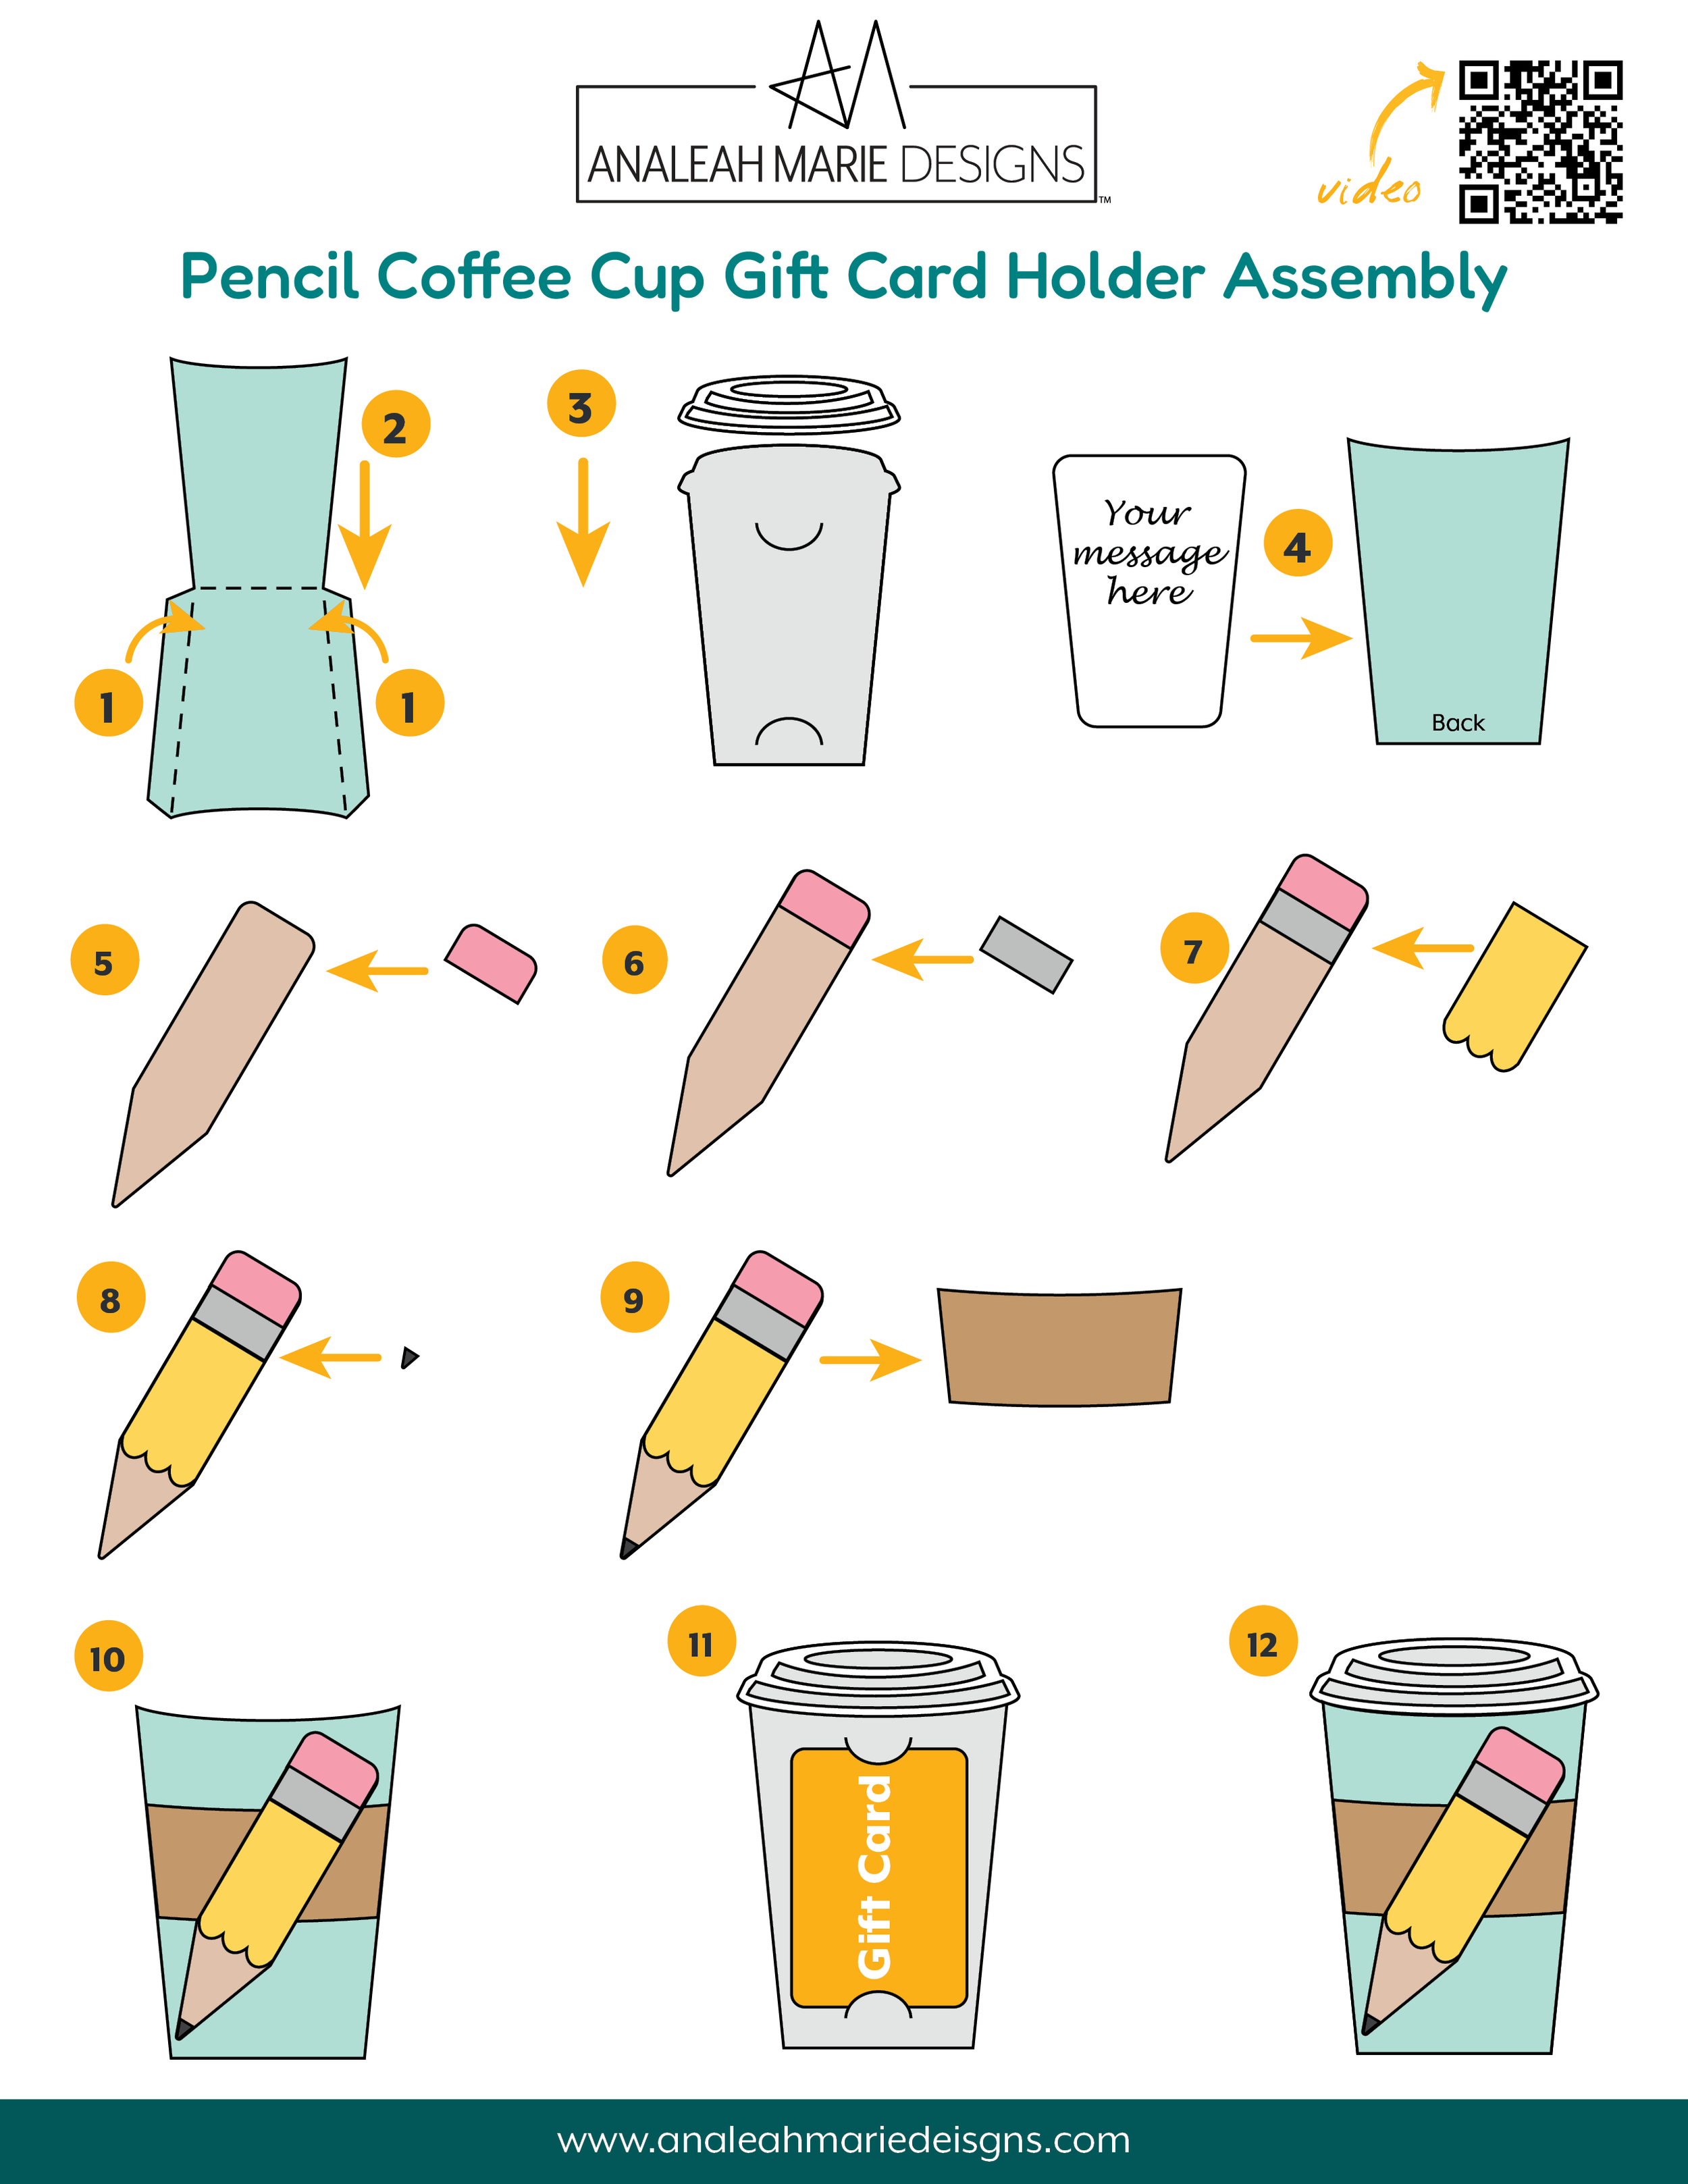
Assembly Steps
Fold and crease the side flaps on the cup base.
Fold and crease the front of the cup base down over the flaps. Add glue to the cup base flaps then glue the front of the cup base down to the flaps, making a pocket.
Glue the white cup lid to the light gray cup insert.
Write you message on the smooth white card and then glue it onto the back of the cup base. I recommend writing your message before glueing, as it will be hard to write on it once the gift card holder if fully assembled.
Tip: Use the sketch feature on your machine to write the message before cutting the piece.
Glue the pink eraser piece to the tan pencil base, lining up the pieces at the top.
Glue the silver ferrule to the pencil base pushed up against the eraser piece.
Glue the yellow pencil piece to the pencil base, pushing it up against the ferrule piece.
Glue the dark grey pencil tip on to the pencil base, lining up the side edges and the tip.
Attach the pencil to the cup sleeve. Foam dots are optional but add some fun dimension to the card.
Glue the cup sleeve to the cup base pocket.
Tuck your gift card into the tabs on the cup insert.
Slide the insert with the gift card into the pocket in the cup base.
Some links in this post may be affiliate links. This means I may earn a small commission at no extra cost to you. I only share tools I genuinely use and love.