Happy Halloween Banner Assembly
Supplies
Green cardstock (2)
Purple cardstock (1)
Black cardstock (10)
Orange cardstock (8)
Yellow cardstock (1)
White cardstock (1)
Adhesive of choice (glue, tape runner, tape dots)
Twine, ribbon, or yarn
The banner is sized so that you can fit two pieces on 12x12 cardstock. The counts next to each color above is for 12x12 cardstock. If you are using 8.5x11 cardstock, you will need to cut each banner piece on its own sheet, so double the number listed above.
If you are using different colors for your banner or using decorative pieces more than once, layout the design in your design software and then count up what you need.
Assembly Steps

Spider
Attach the black spider and web piece to one of the green pennants
Bat

Attach the green bat piece to one of the black pennants
Candy Corn
Attach the yellow candy corn piece to the white pennant
Attach the orange candy corn piece on top of the yellow piece
Attach the black candy corn piece on top of the orange piece
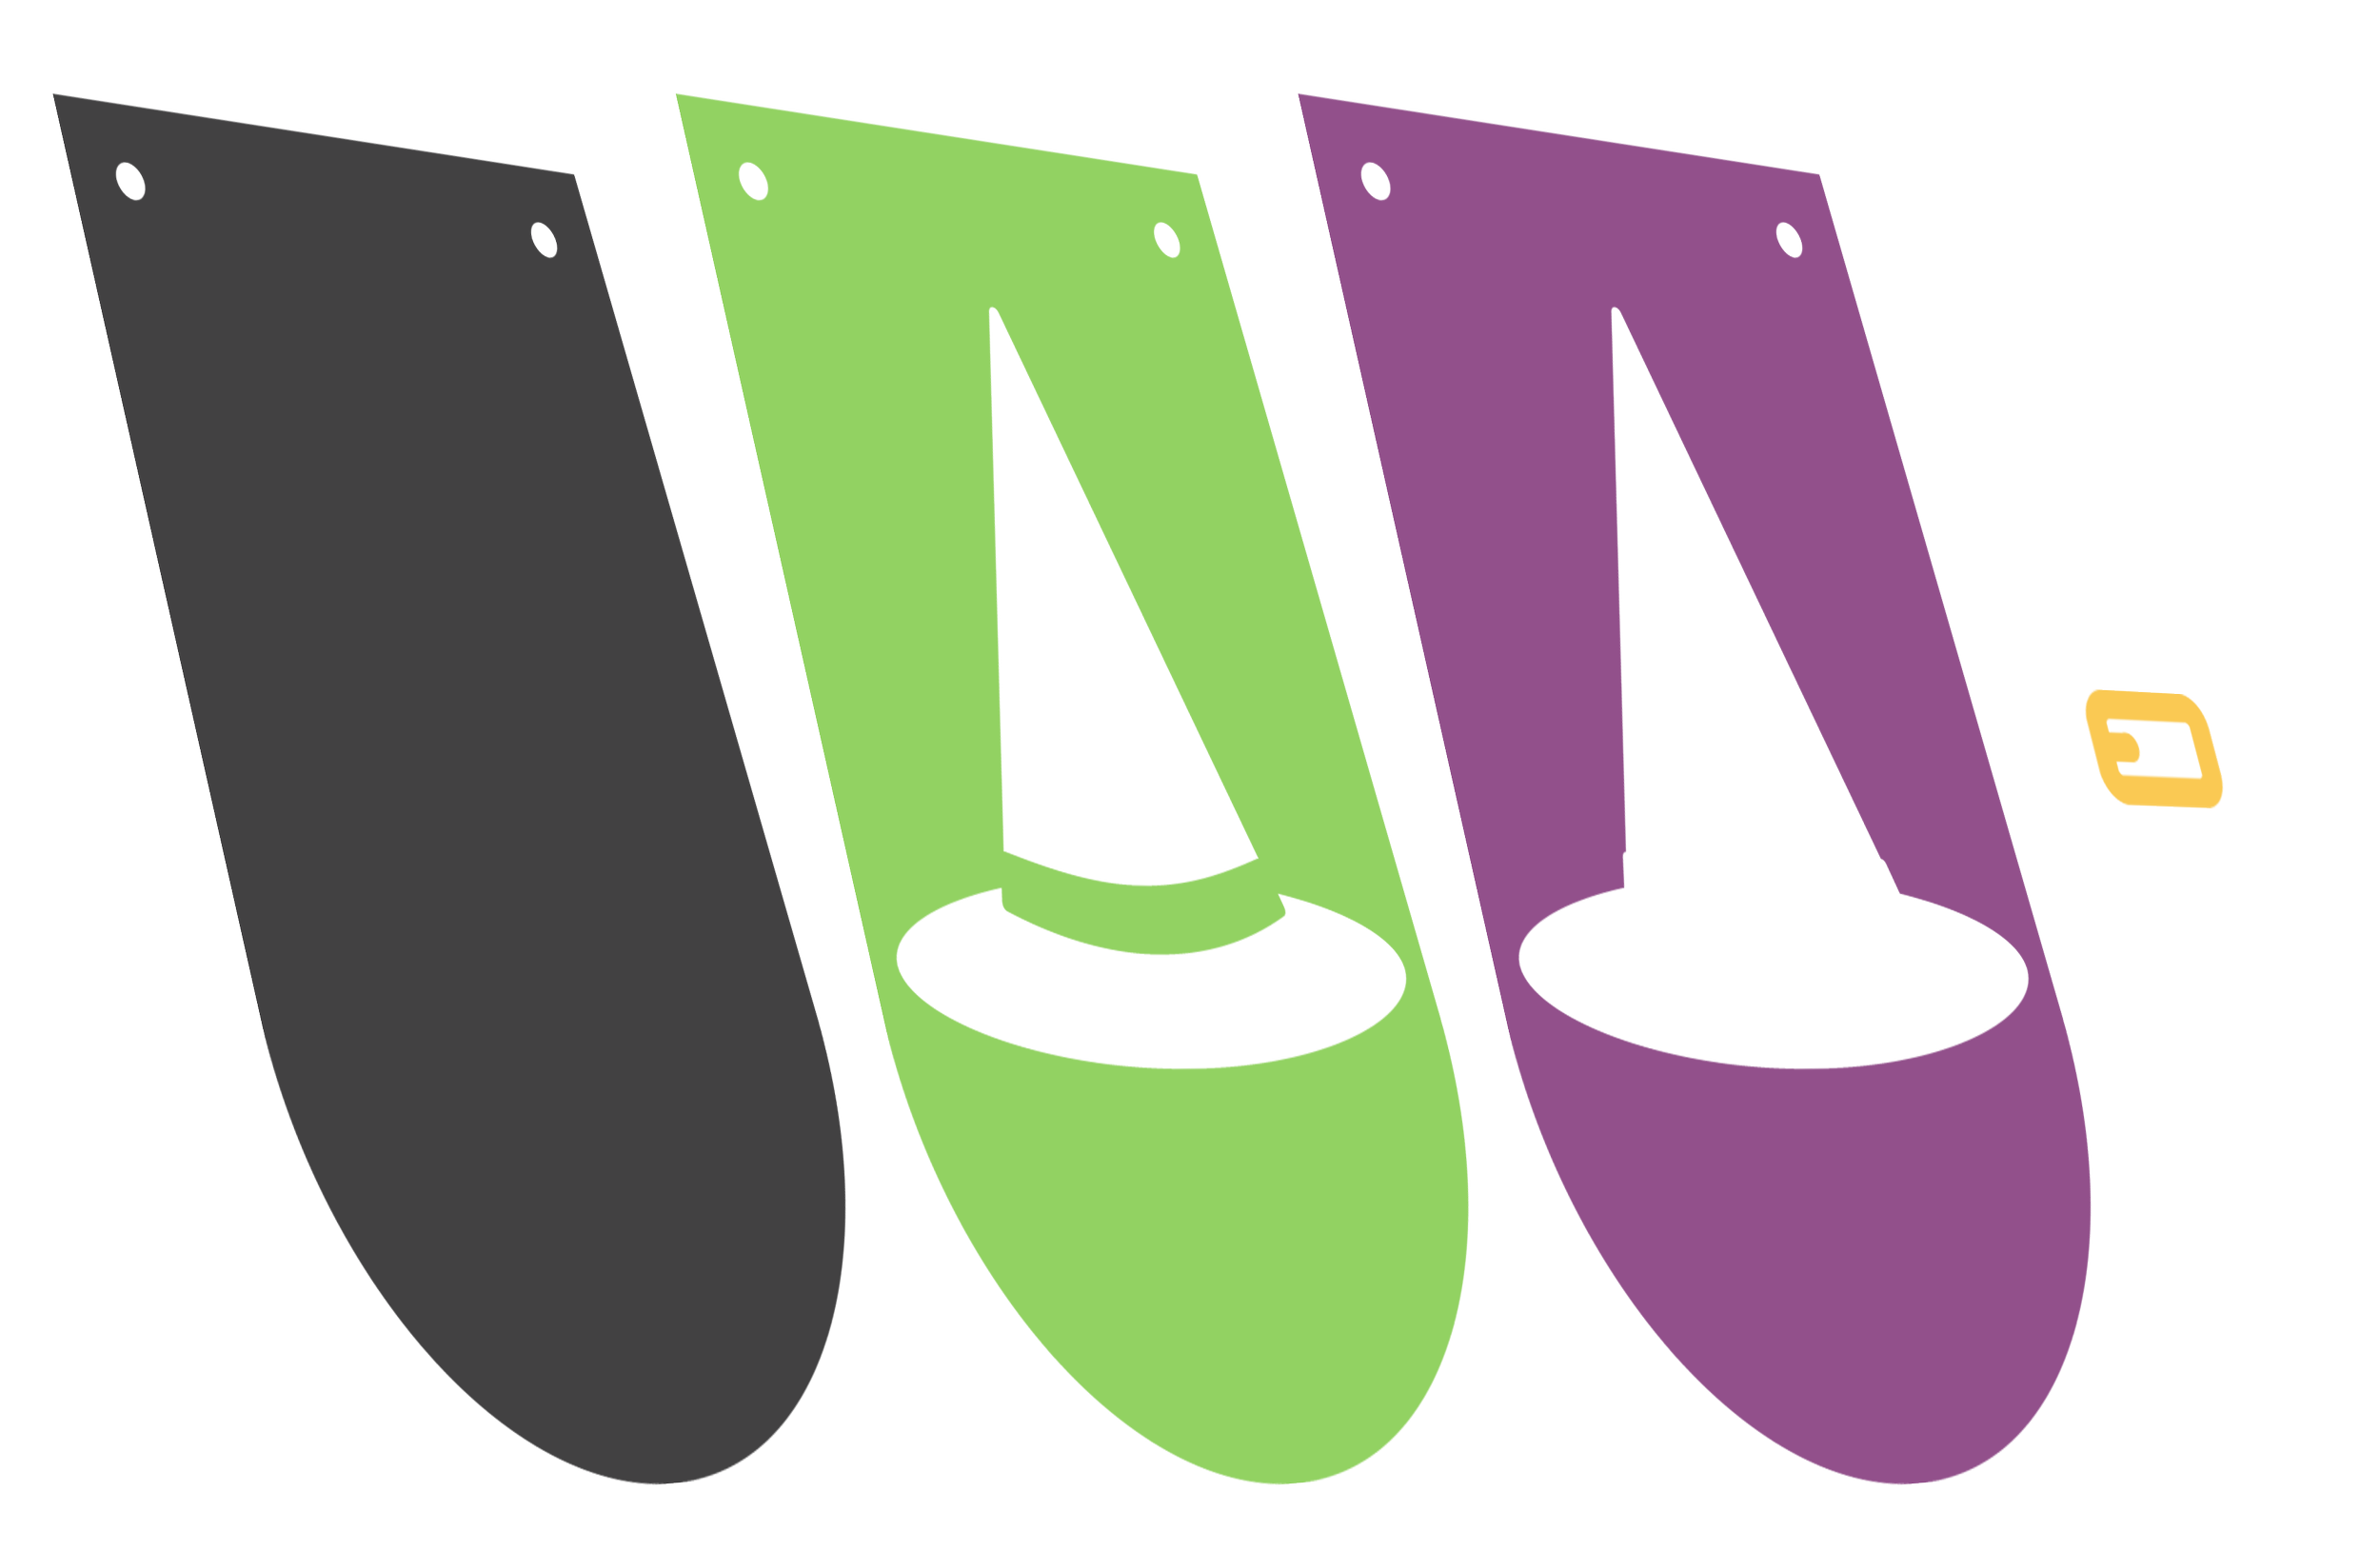
Witch Hat
Attach the green witch hat piece to a black pennant
Attach the purple witch hat pieces on top of the green piece
Attach the yellow witch hat buckle on top of the green band on the witch hat
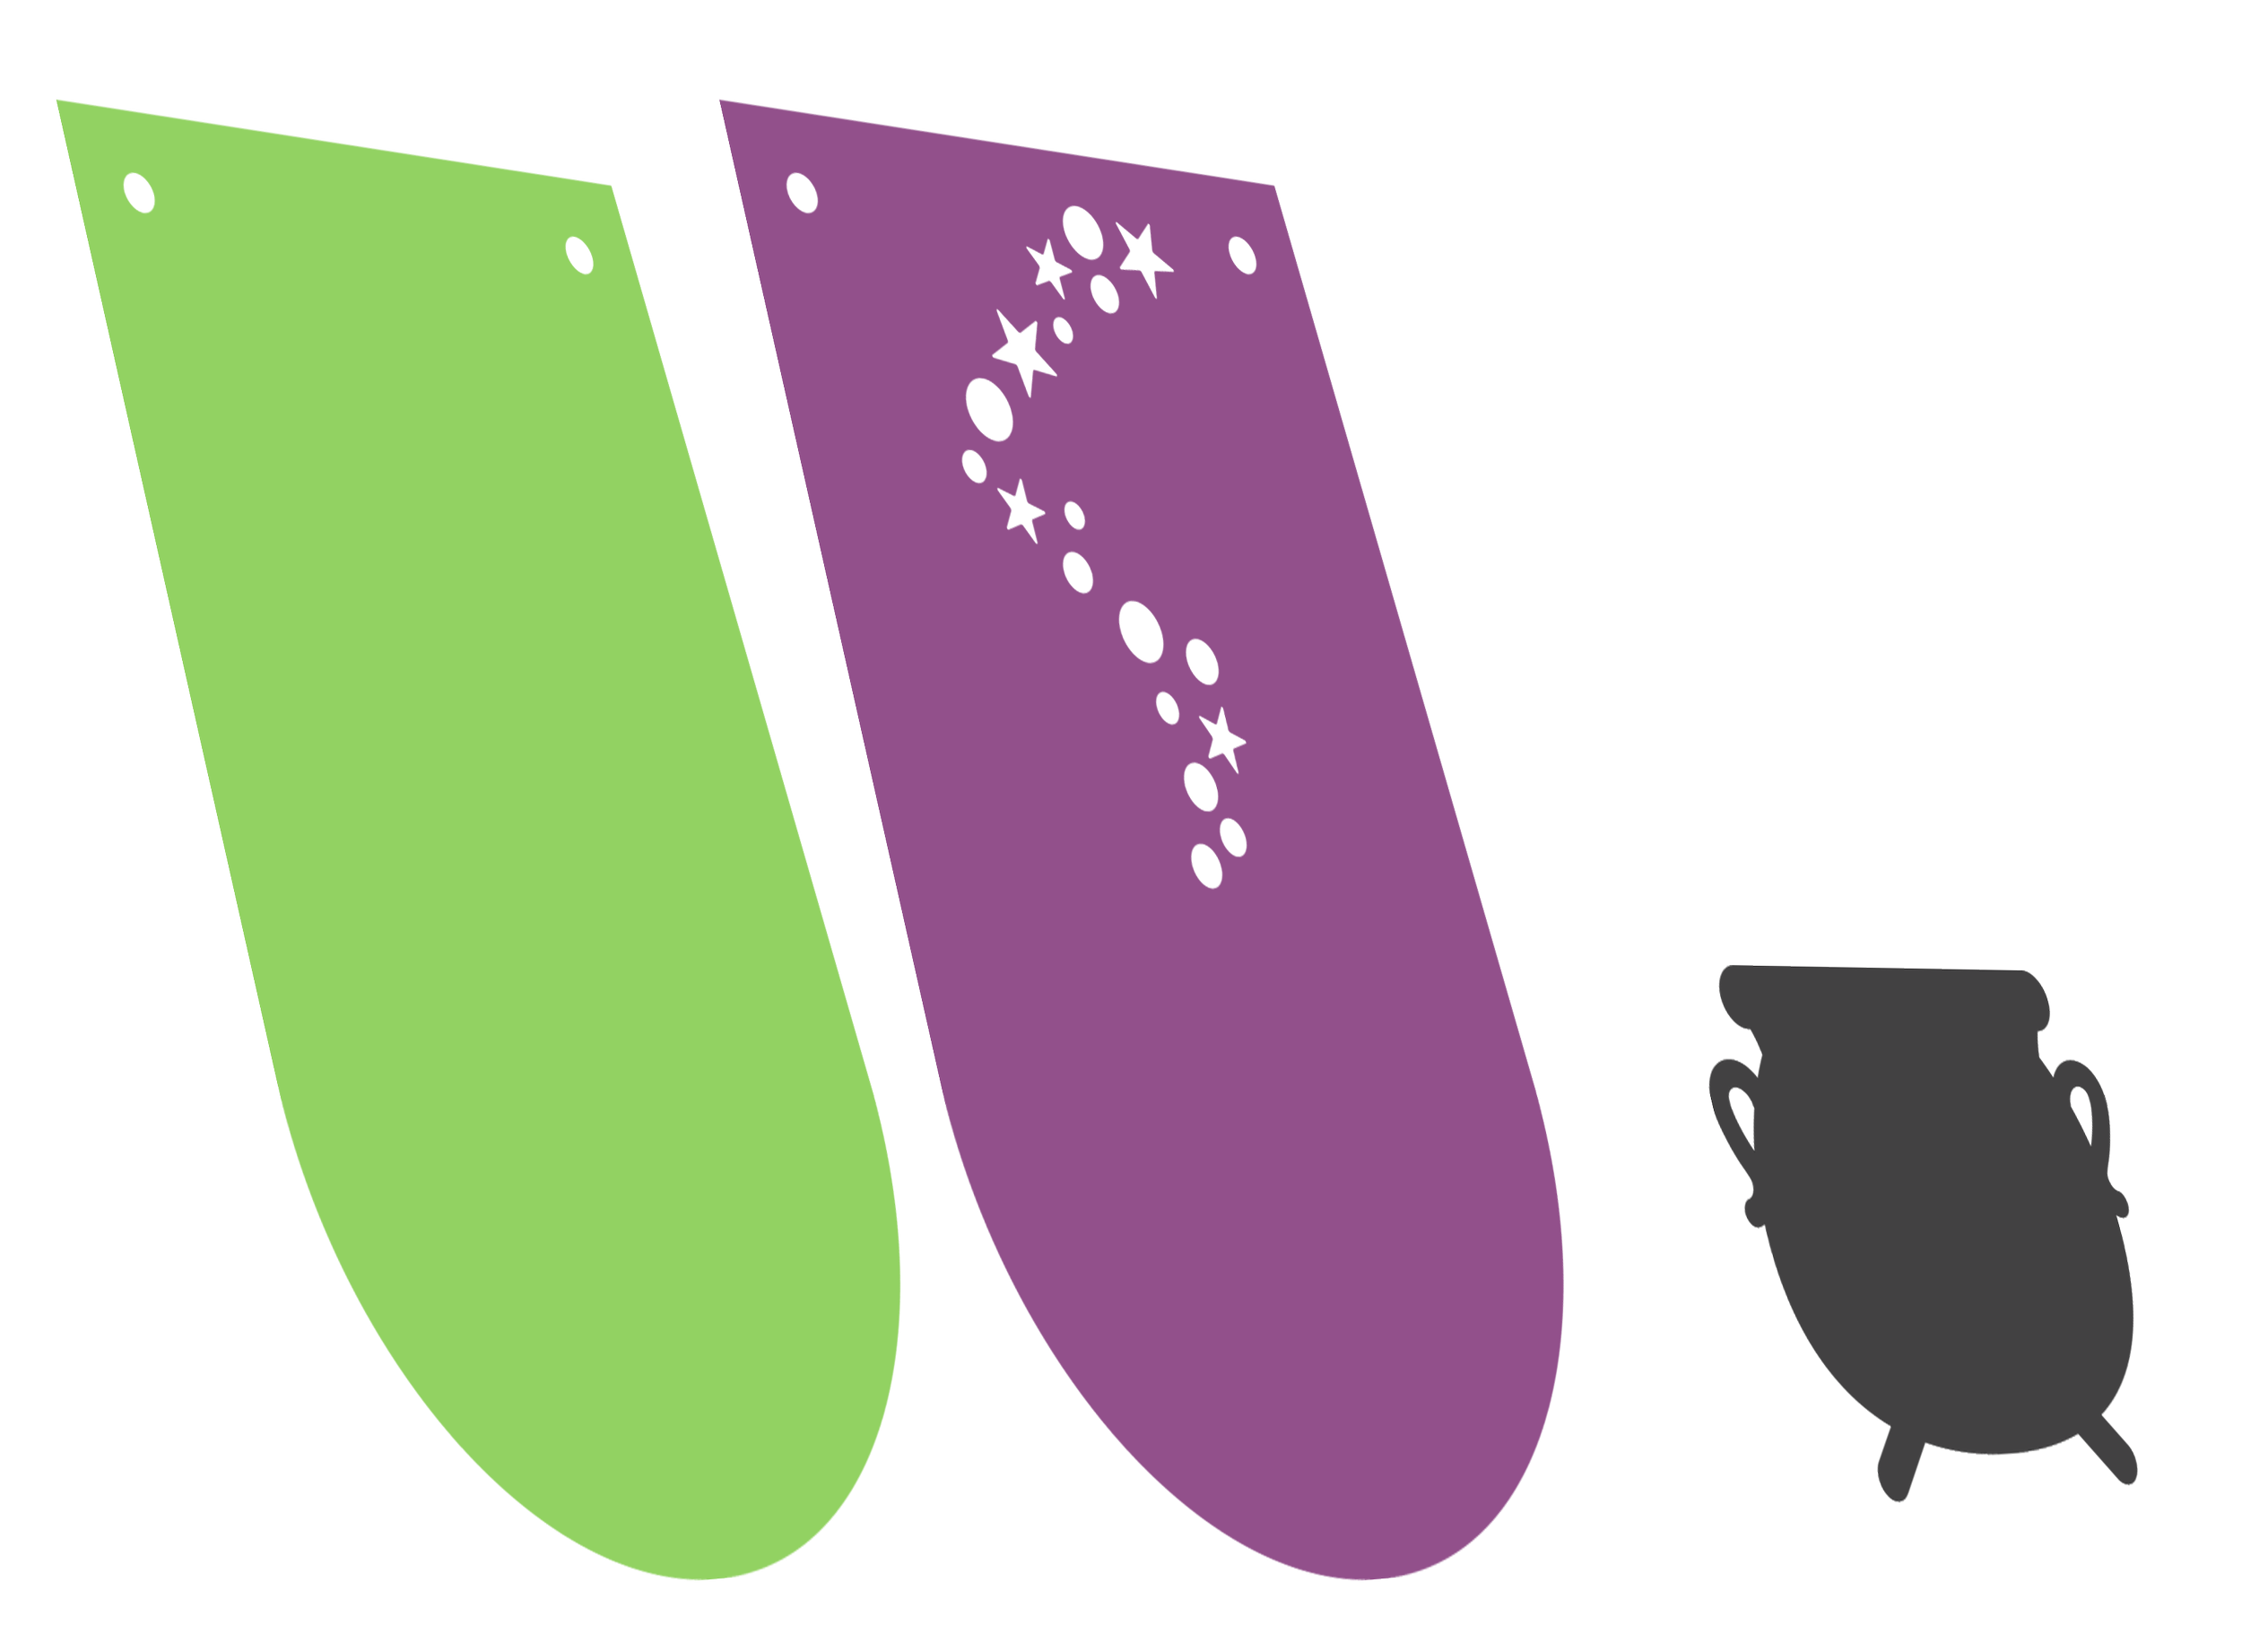
Cauldron
Attach the purple cauldron bubbles piece on top of a green pennant
Attach the cauldron piece on top of the purple piece
Letters

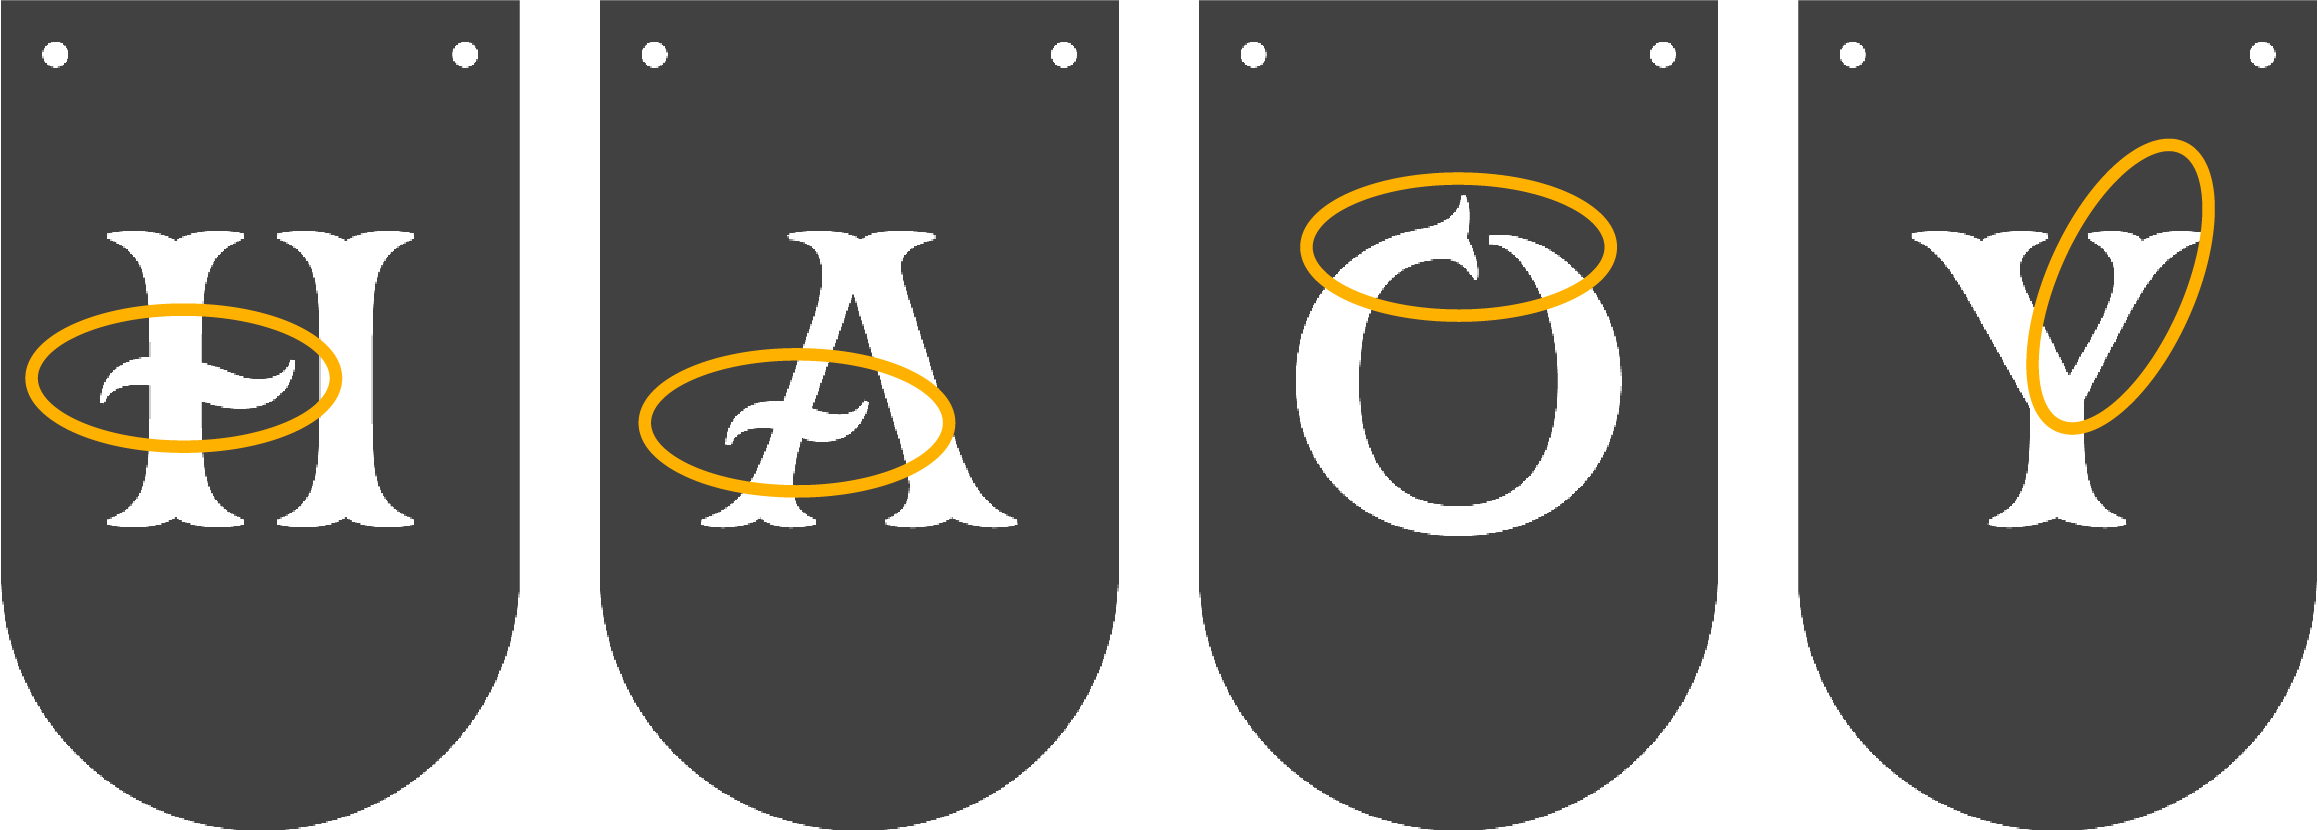
All the letter pieces are assembled in the same way.
Attach the black letter piece to an orange pennant
Note the direction of the H, A, O, and Y pieces when you are assembling because they are easy to attach backwards (I know from experience!). The swooshy crossbar on the H and A should be on the left-hand side when faced correctly. The narrow ascender on the Y should be on the right-hand side when facing you. The decorative bit on the top of the O should be on the left-hand side when facing you.