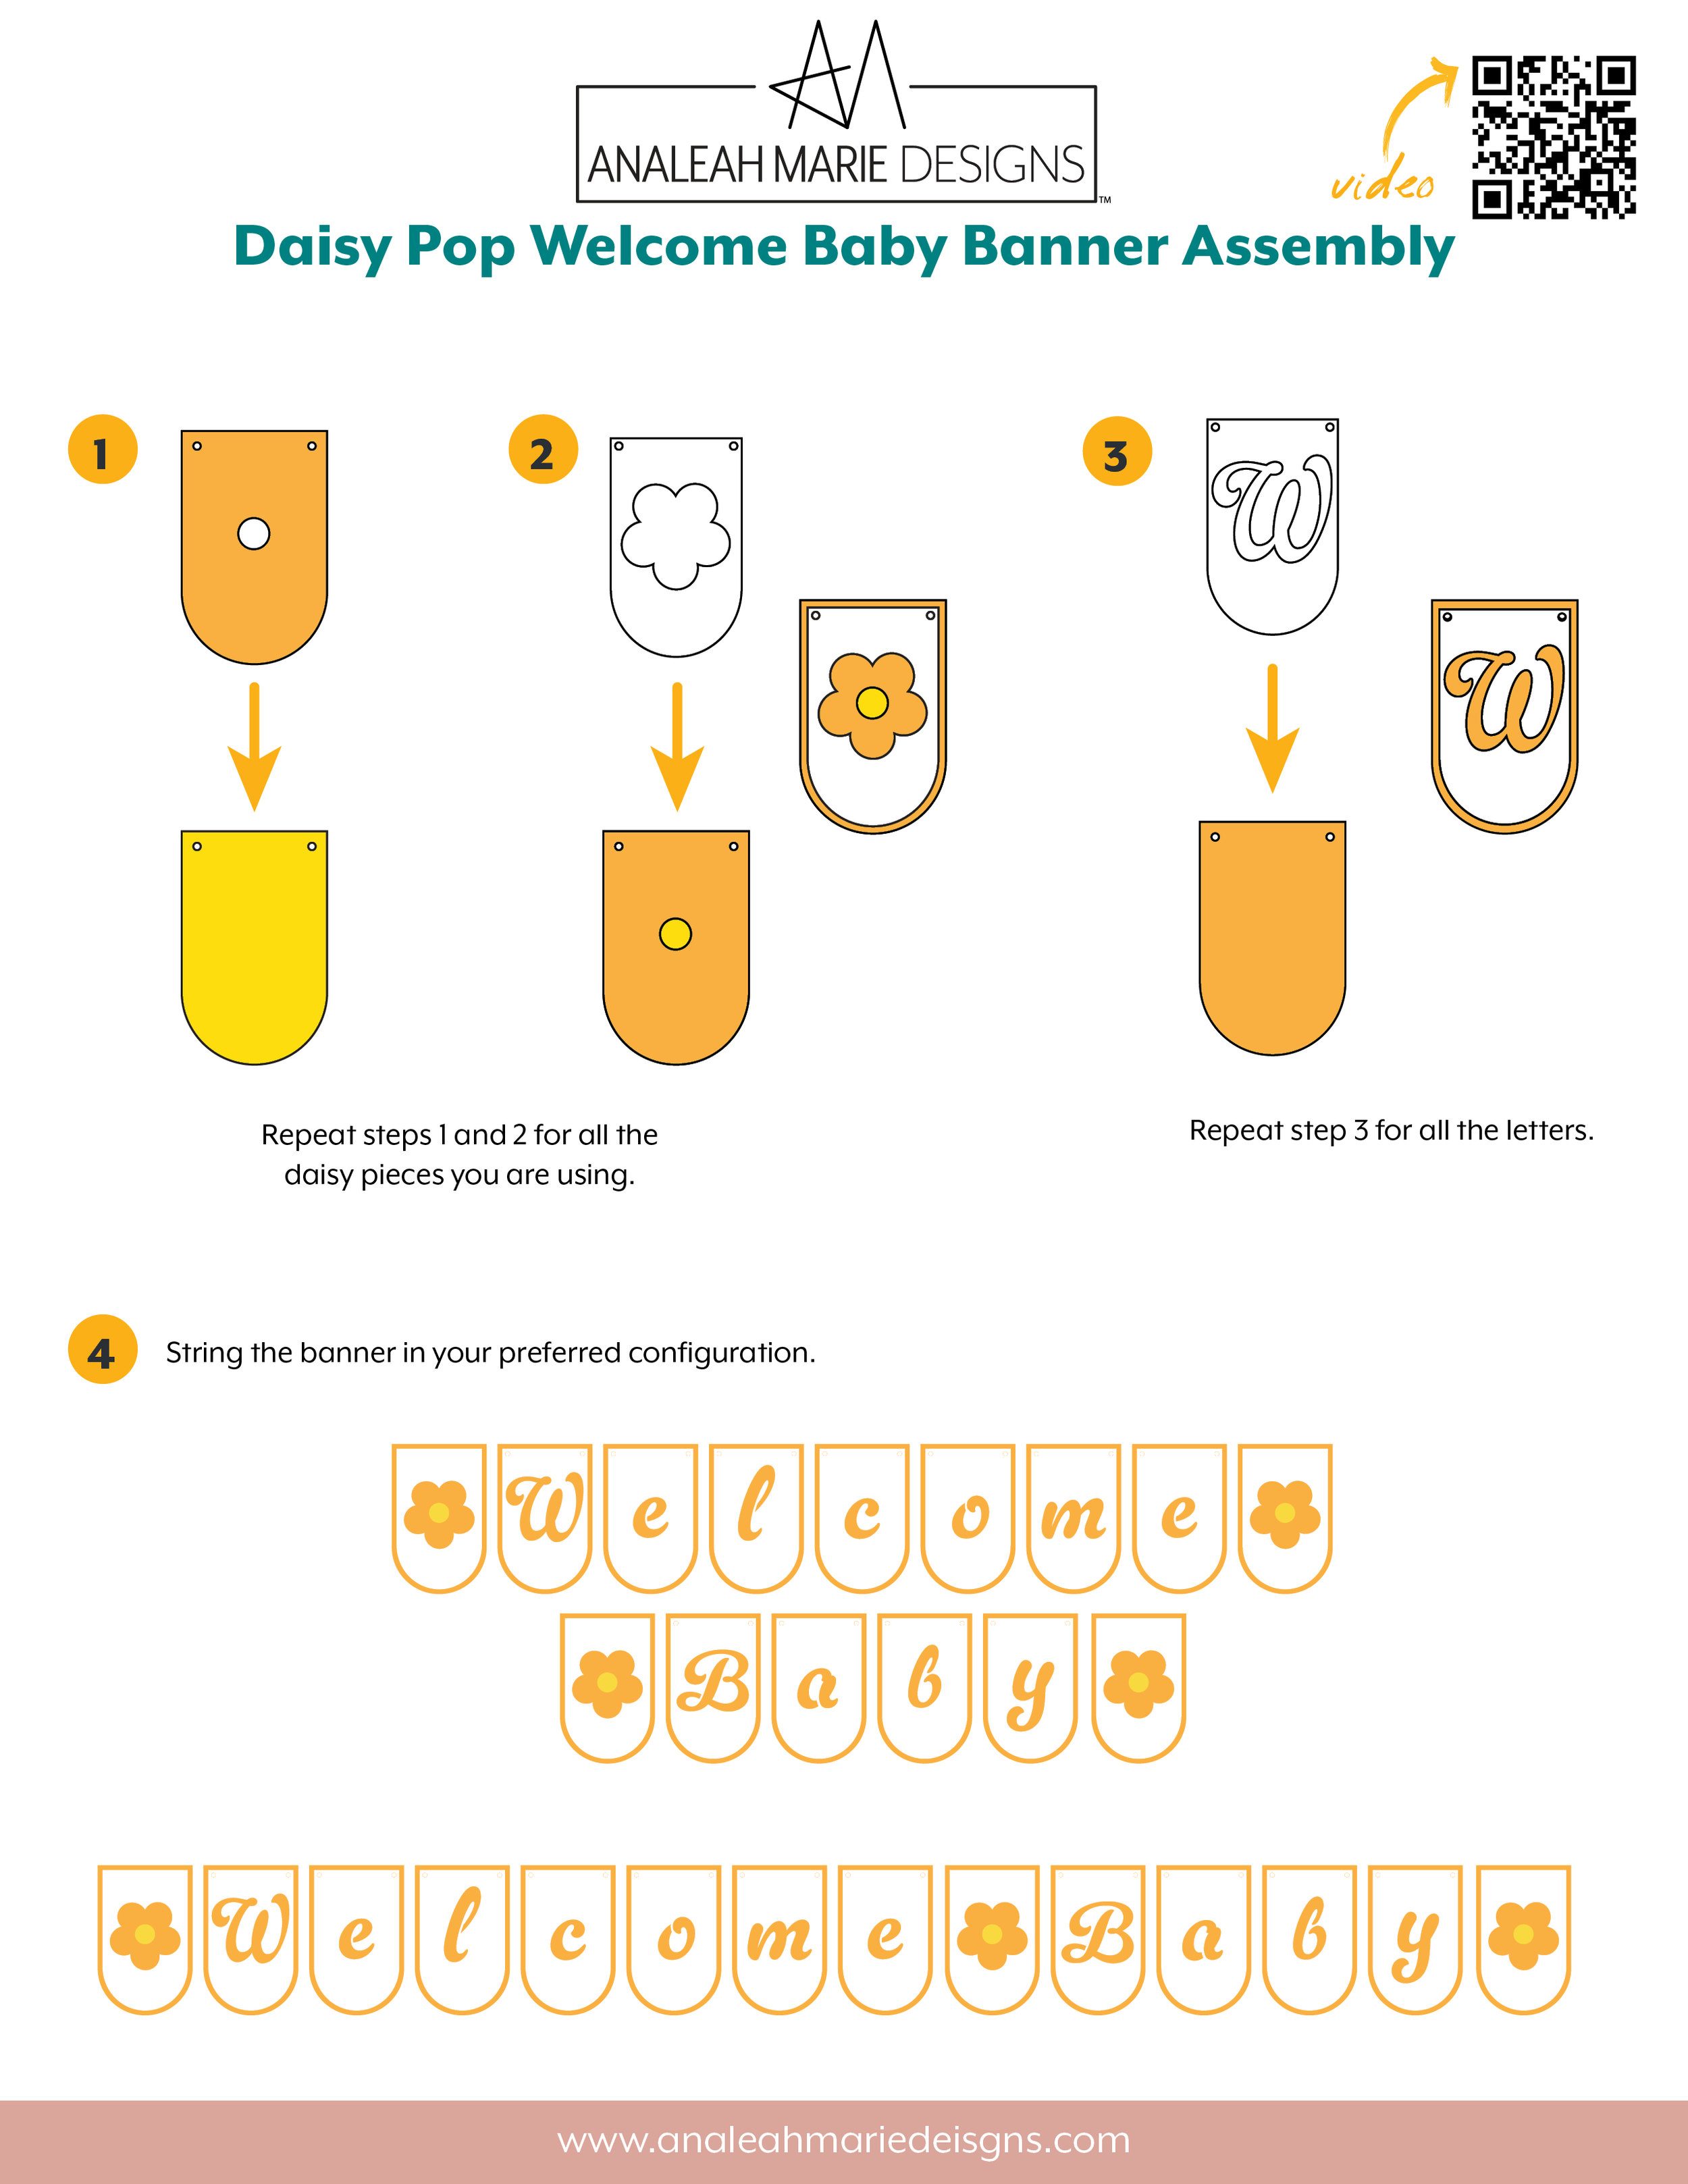
Welcome Baby Daisy Pop Banner Assembly
Supplies
Orange cardstock
Yellow cardstock
White cardstock
Glue, tape runner, or glue dots
What Paper I Used
For this banner (and matching card and cake topper), I used Encore textured cardstock from 12×12 Cardstock Shop in the following colors:
Cantaloupe
Banana Pudding
Snowy White
As an alternative, the AC Cardstock Pastel collection has white, yellow, and orange that work well for this banner, but you’ll need to buy multiple packs to have enough of each color for the whole banner. You can buy individual colors of AC Cardstock from 12×12 Cardstock Shop.
Quick Cutting Note: If you are going to assemble the banner as one long line, you can delete one of the decorative daisy pieces before cutting, since you will only need three.
Assembly Steps
Attach the orange banner piece with the hole in the middle to the solid yellow piece.
Attach the white daisy cut out banner piece on top of the orange piece with the hole.
Repeat steps 1 and 2 to assemble all your daisy pieces.Attach the white letter piece on top of the solid orange piece.
Repeat step 3 for all the letters.String the banner in your preferred configuration.